Sep 2, 2026
Register any coding CLI as a first-class agent
Custom agents let you plug a fork, a niche CLI, or your own wrapper into 1DevTool with its own logo, session history and memory files — no release required. Plus terminal selection with merge, a status-bar worktree picker, and a real markdown/terminal split.
There is a particular kind of disappointment that comes from finding a coding CLI you like.
You install it, you run it in a plain shell, and it works. Then you go back to your workspace and it is a stranger there. No logo on the tab — just the command you typed. No entry in Resume, so when you quit, the conversation is gone. No Memory panel, because 1DevTool has no idea which file that CLI reads. Change AI does not list it. Prompt History files it under nothing. Every affordance the built-in agents get, this one does not, and the only fix was to ask for it and wait for a release.
That gap closed in v1.70.0.
What changed
Any coding CLI on your machine can now be registered as a first-class agent. You describe it once — name, colour, where it stores sessions — and from then on it behaves like Claude or Codex everywhere in the workspace.
How it works in practice
Register the command as an agent
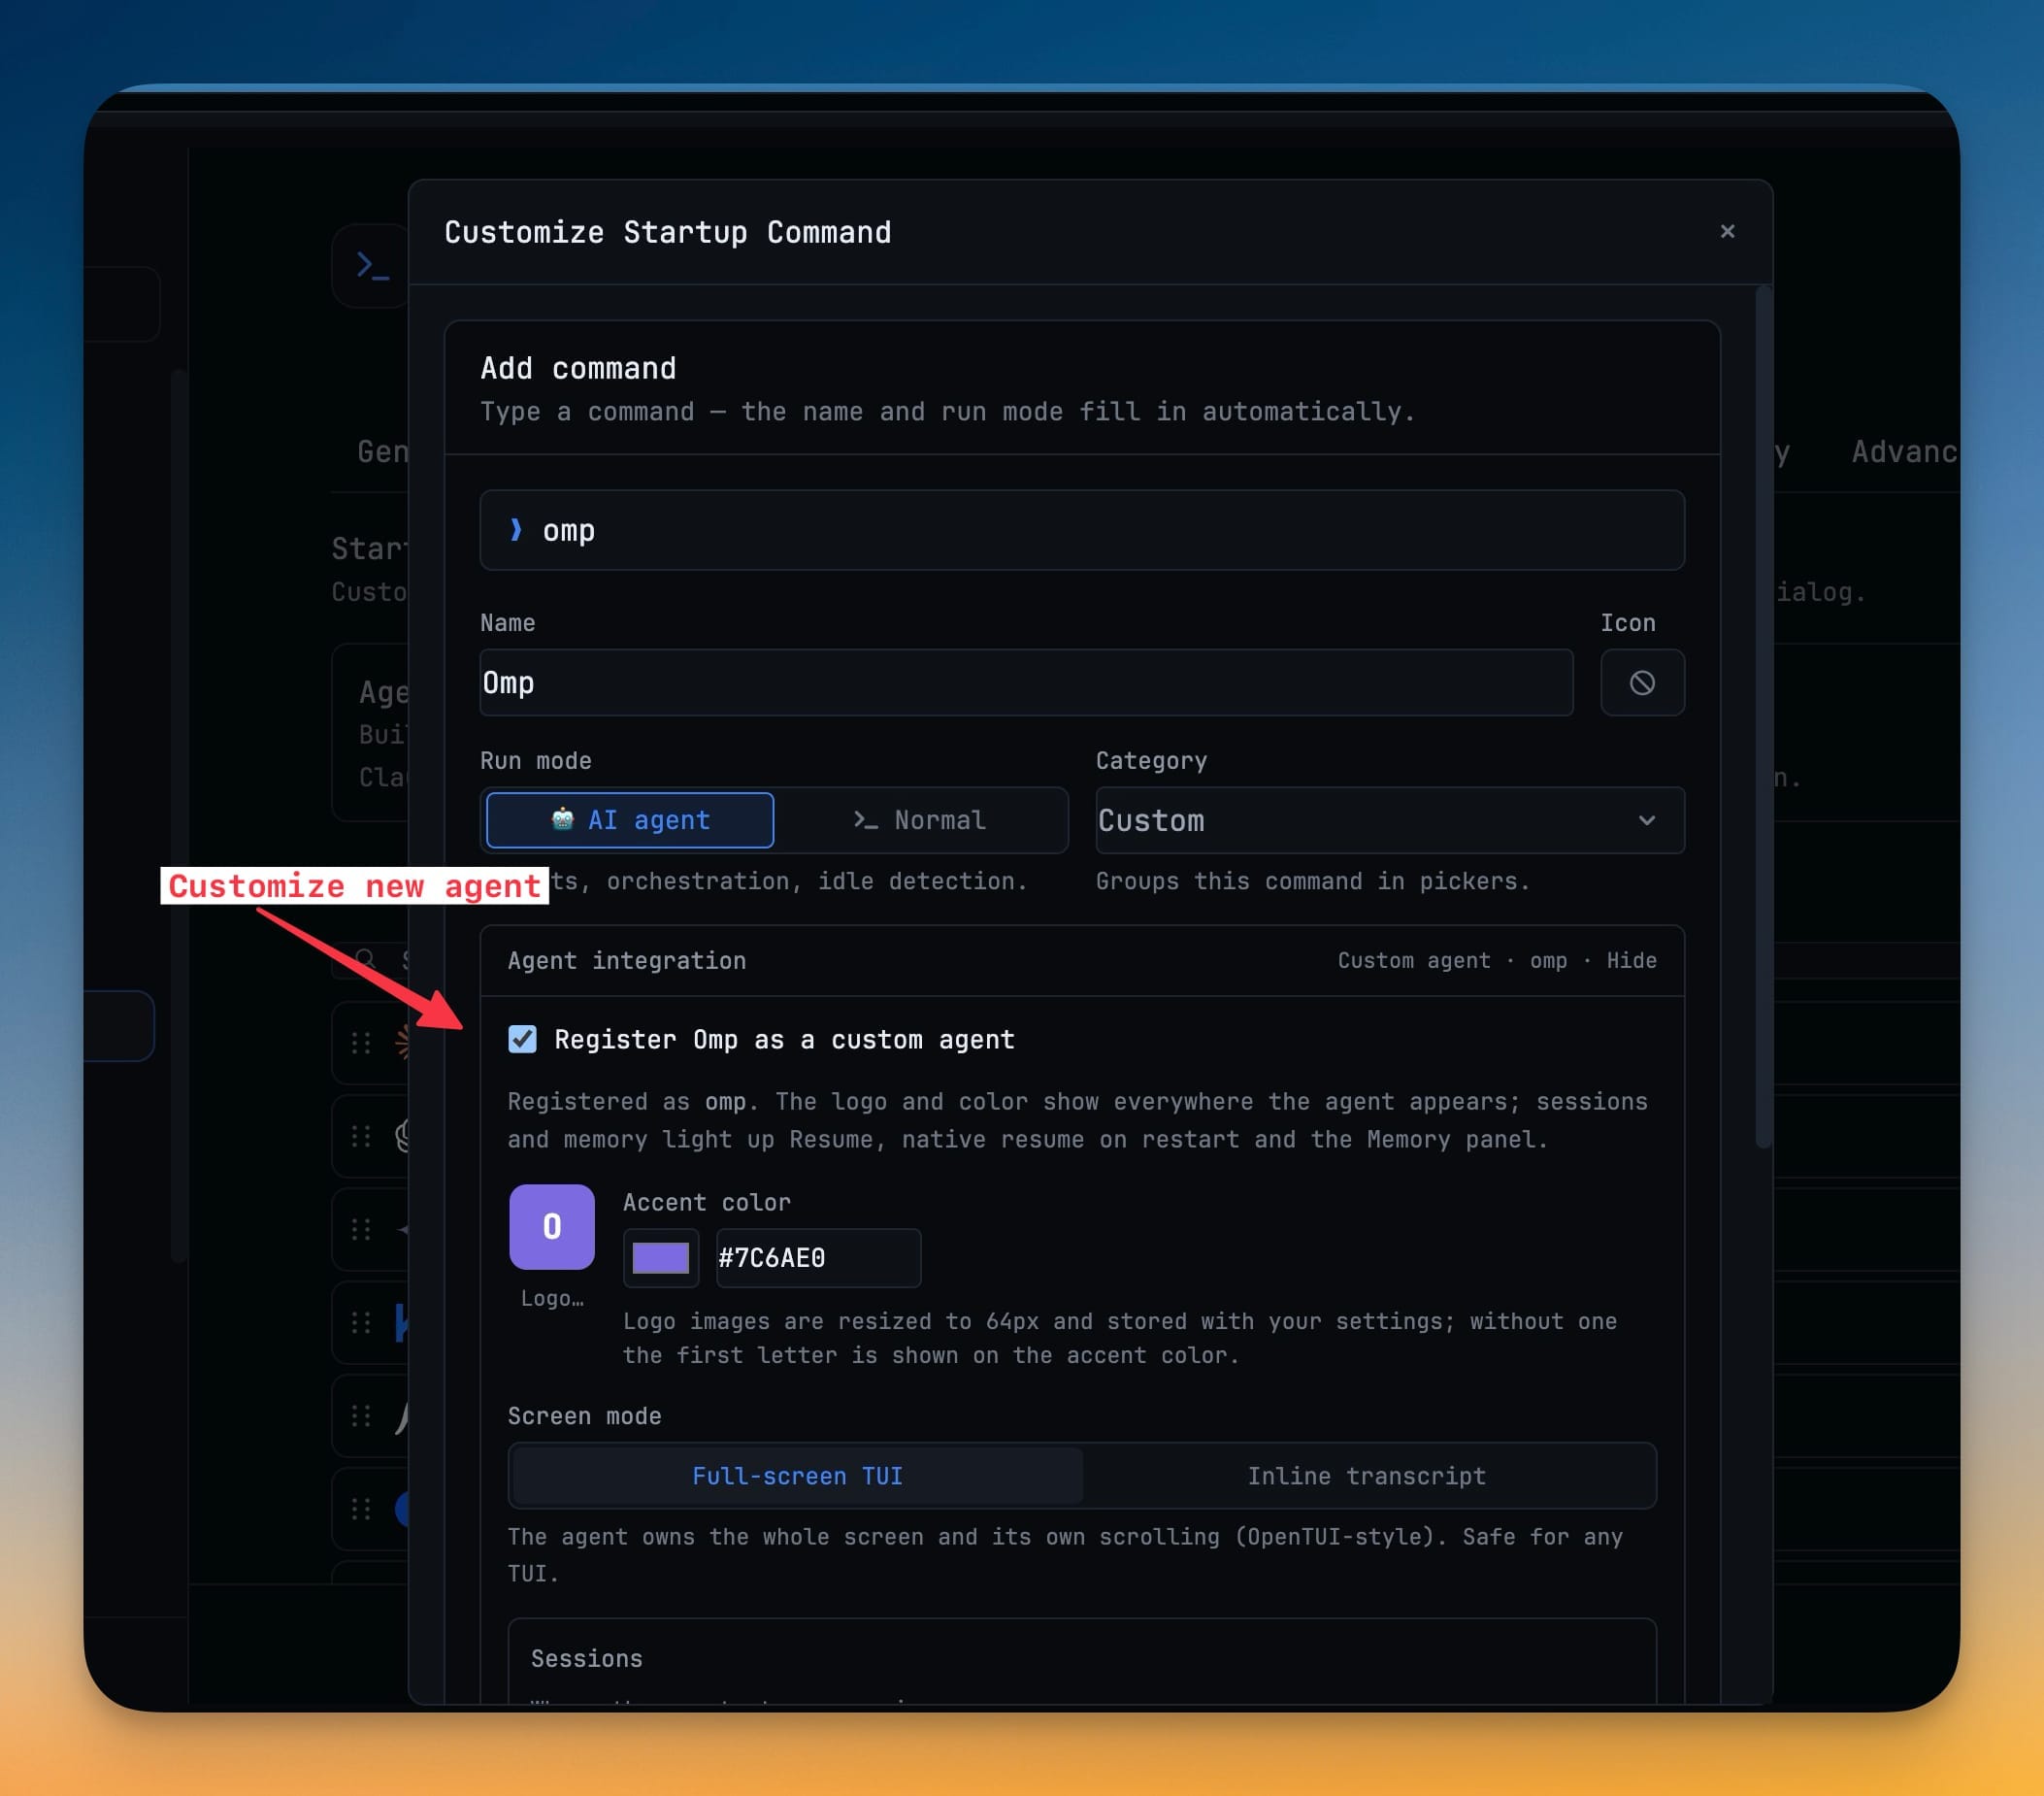
Open Settings → Terminal → Commands, add or edit the command, and set Run mode to AI agent. That alone tells 1DevTool to treat the terminal as an agent — prompts, orchestration, idle detection. Then expand Agent integration and tick Register <name> as a custom agent.
The agent's stable id is derived from the executable, so omp stays omp even after you edit the flags on the command later.
Give it a face
Set an accent colour and, optionally, a logo. Logo images are downscaled to 64px and stored with your settings — no file paths that break when you move things around. Skip the logo and you get the first letter of the name on the accent colour, which is honestly enough to tell two agents apart at a glance.
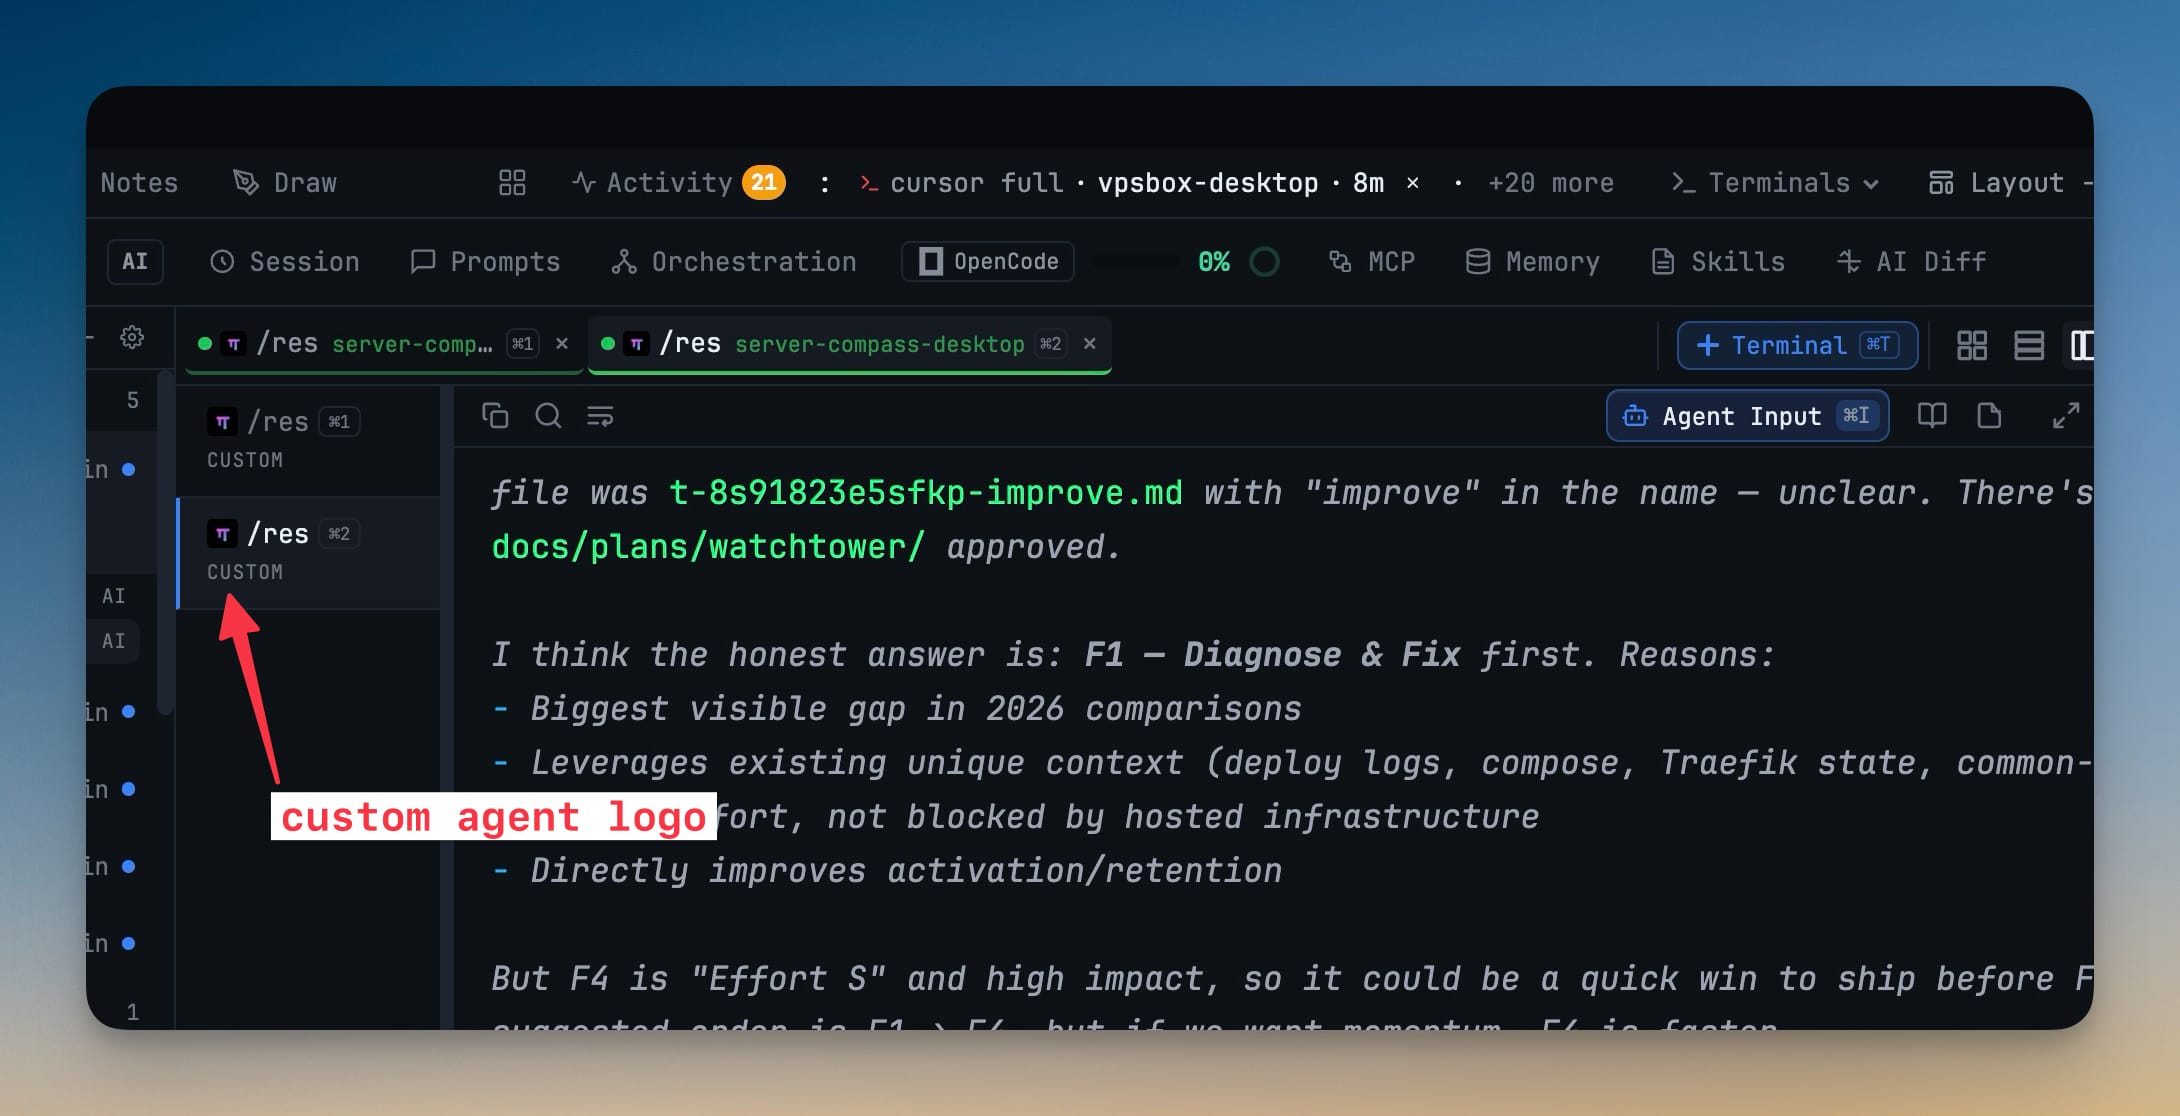
This is the part you notice hours later, when six terminals are open and you can see which is which without reading a single tab title.
Point it at your sessions, and test before you commit
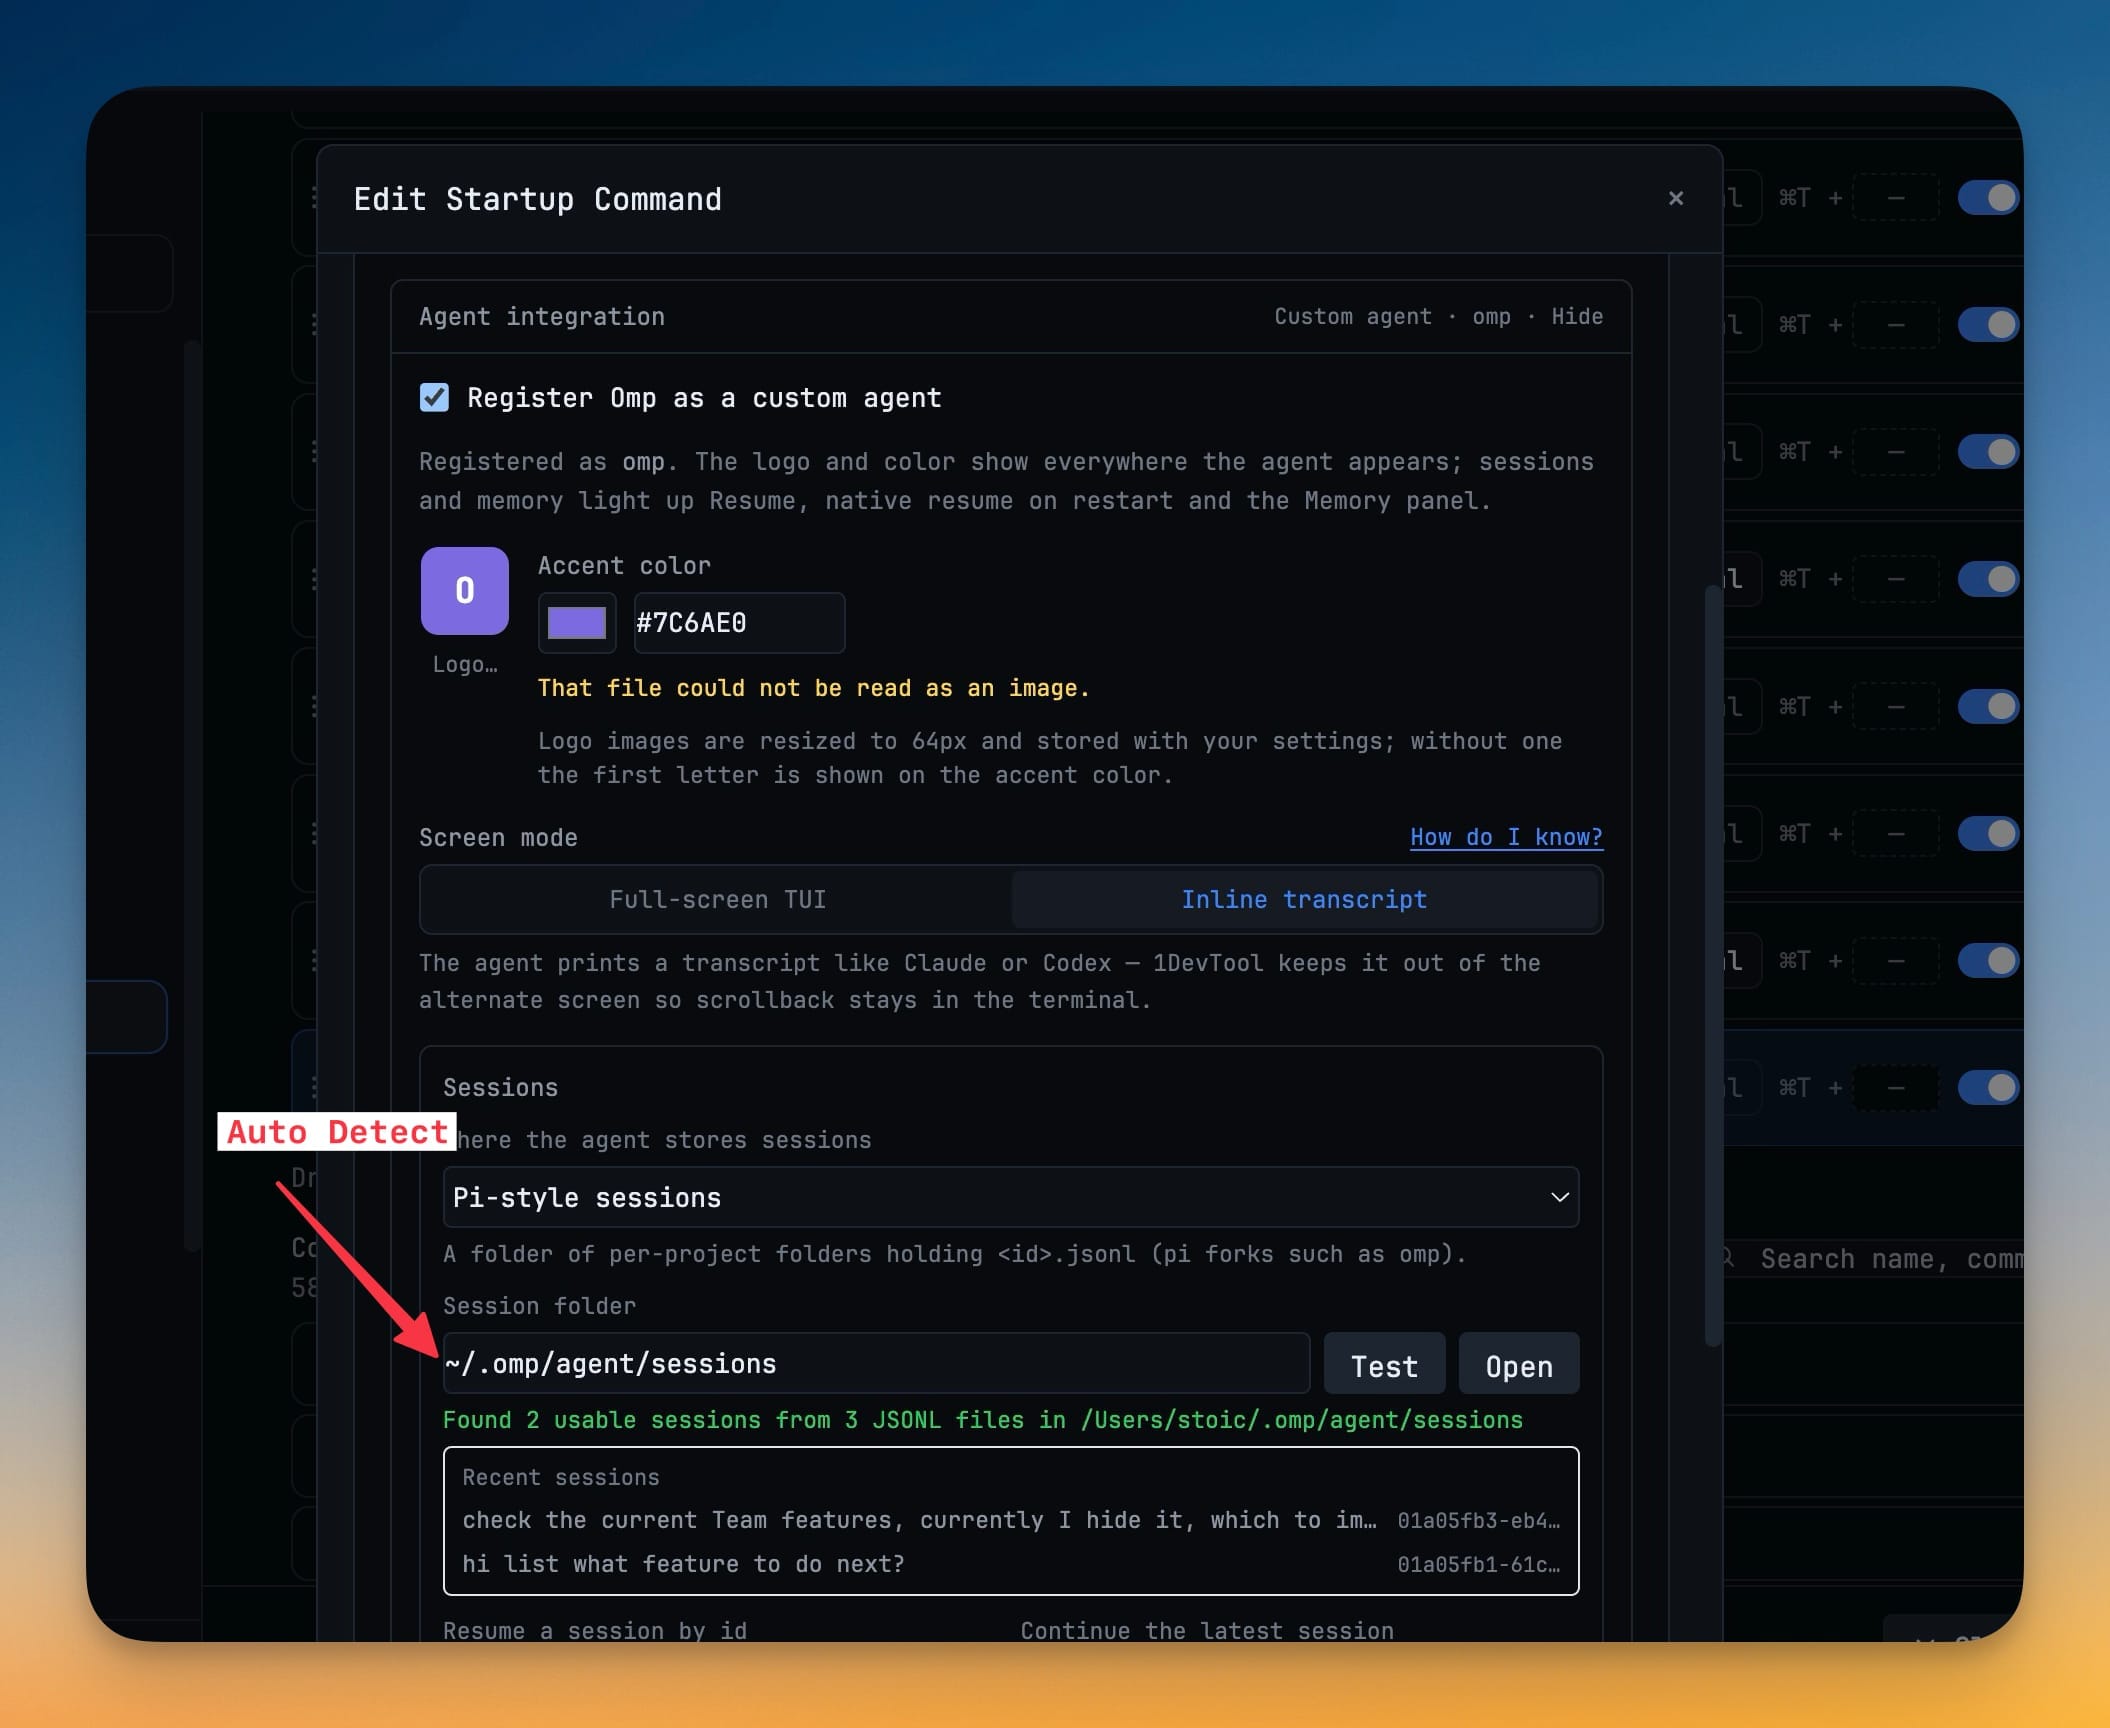
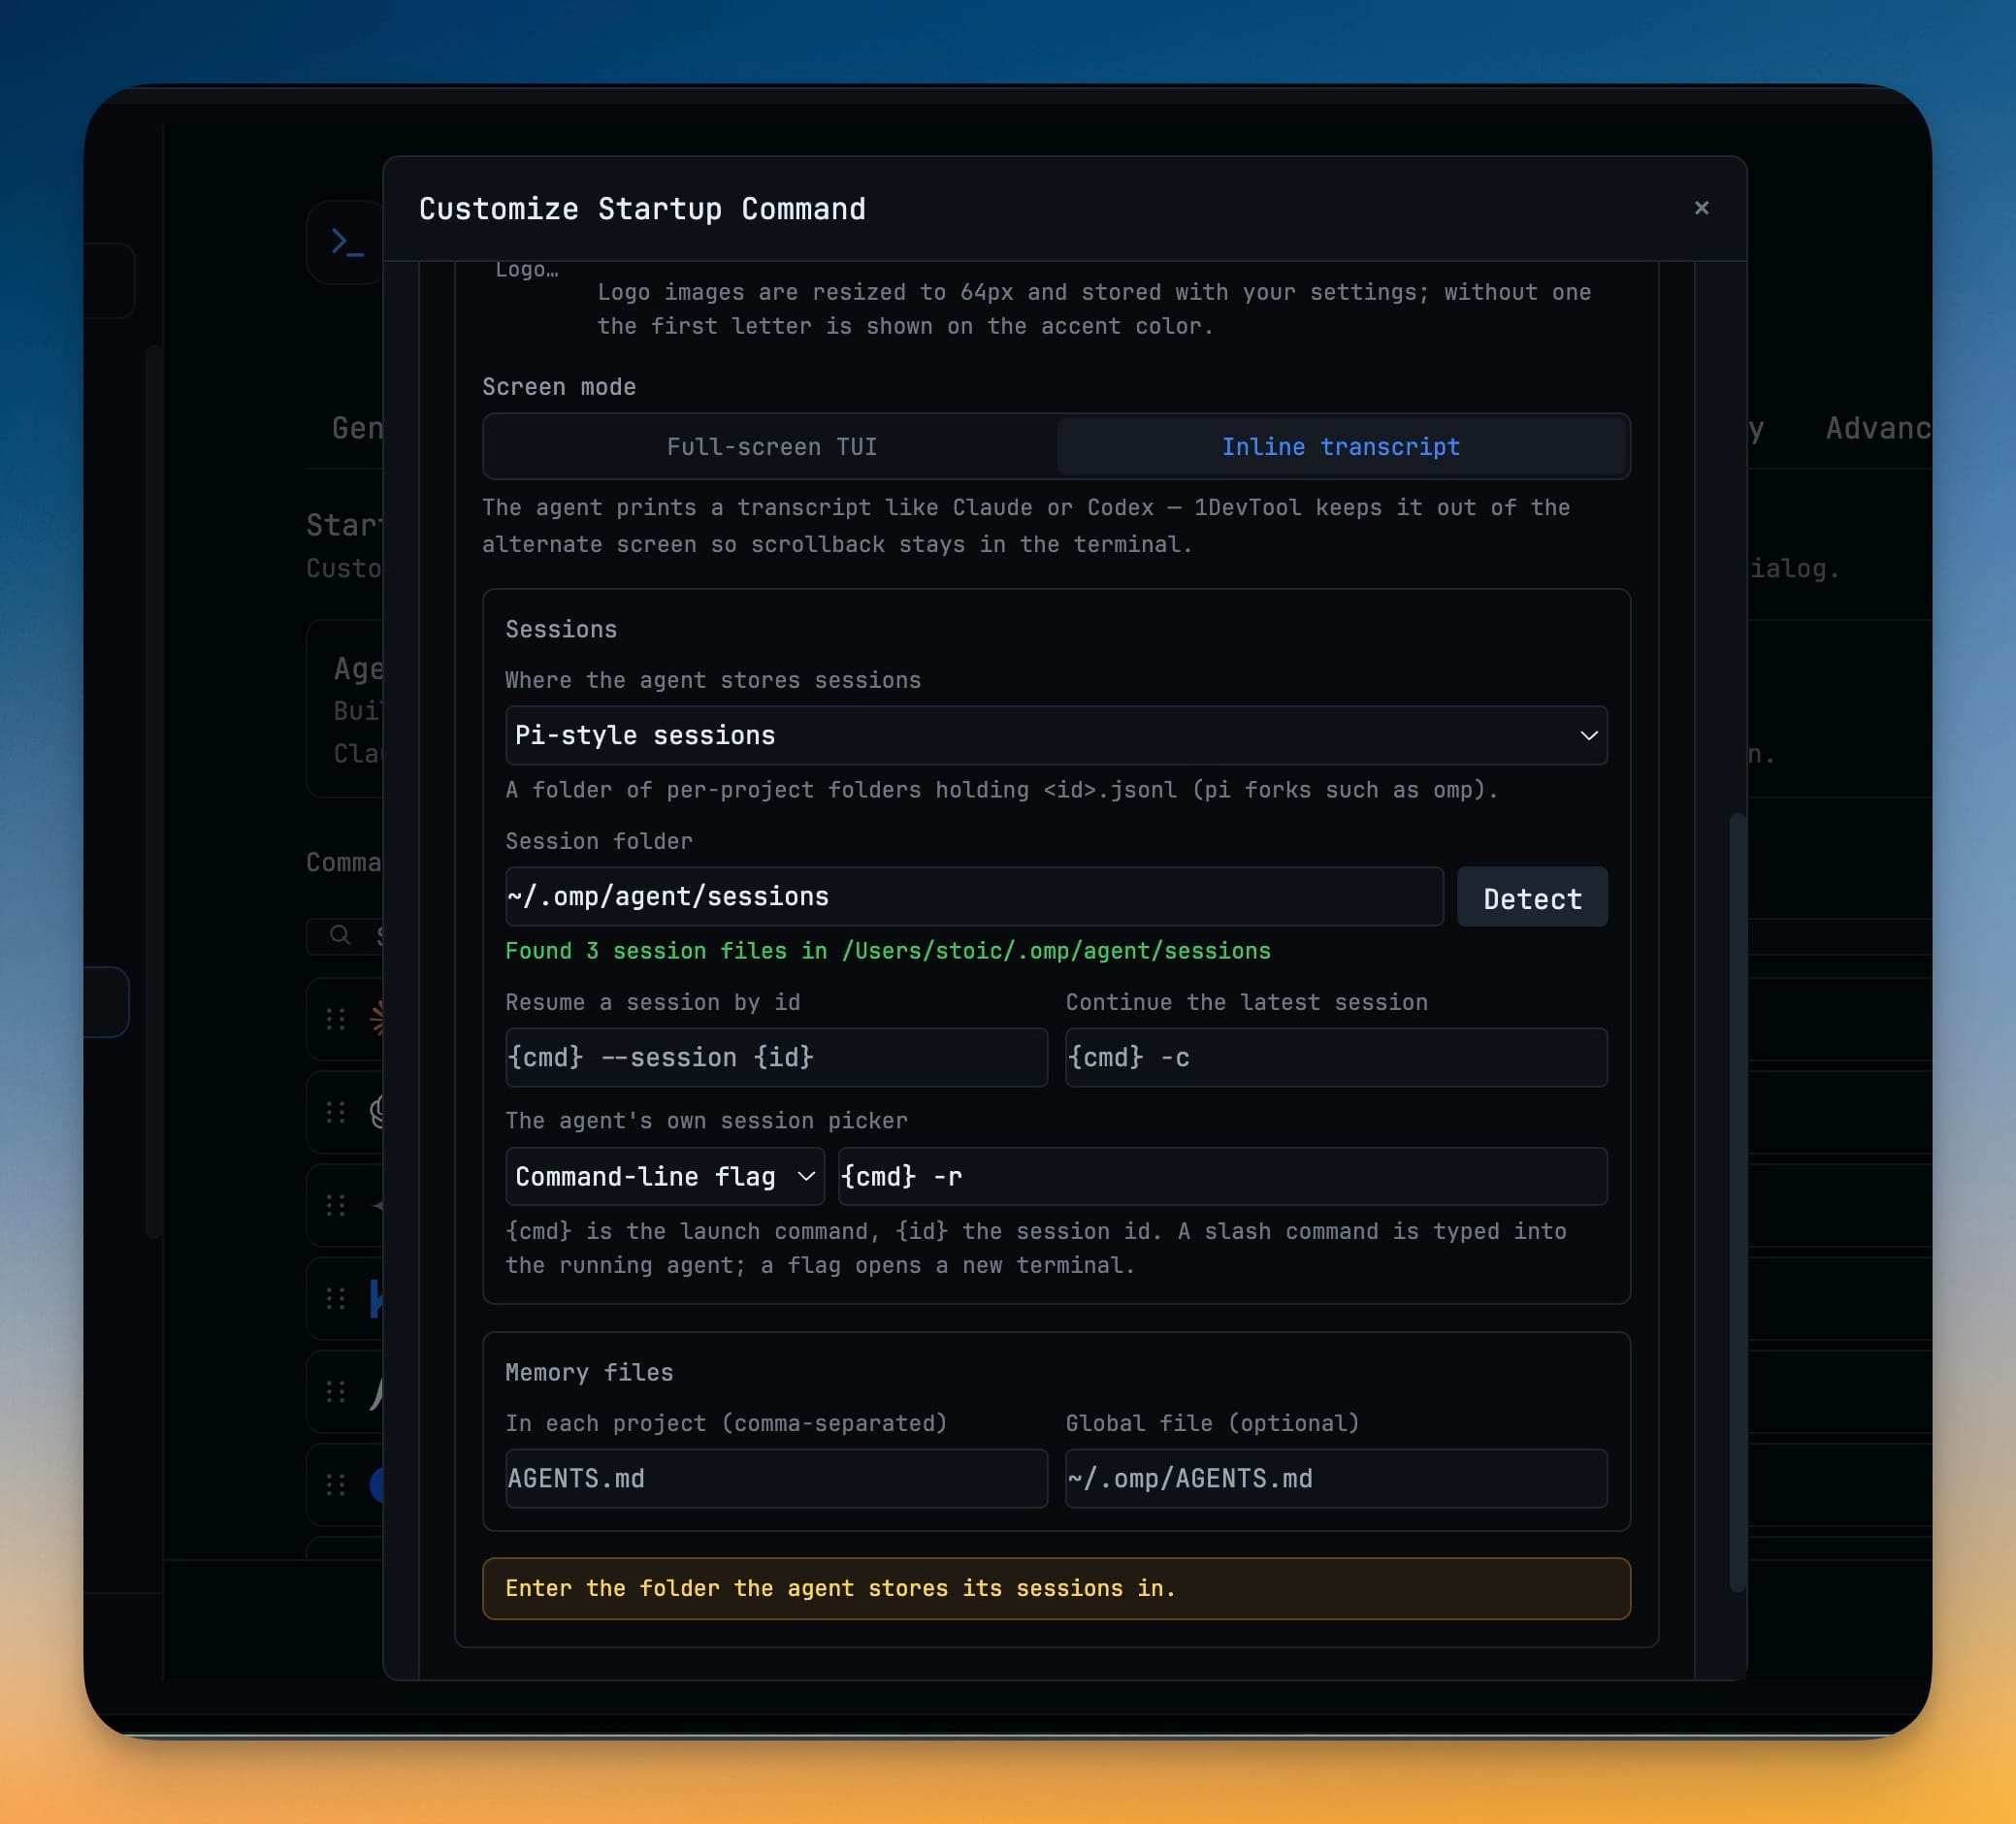
This is the step that makes the registration worth doing. Tell 1DevTool where the CLI writes its transcripts and pick the layout that matches:
- Pi-style sessions — a folder of per-project folders holding
<id>.jsonl - Claude-style projects —
<root>/projects/<encoded-cwd>/<id>.jsonl - Flat JSONL folder — one directory of
*.jsonlfiles - None — skip scanning; use the picker or continue-latest only
Then press Test. You get a real answer — Found 2 usable sessions from 3 JSONL files in /Users/you/.omp/agent/sessions — along with a preview of the actual conversations it found, before you save anything. Open reveals the folder in your file manager when the path is wrong and you want to look.
Fill in the resume templates once
Every CLI spells resumption differently, so 1DevTool asks you for the shapes rather than guessing them. {cmd} is the launch command and {id} is the session id:
- Resume by id —
{cmd} --session {id} - Continue the latest —
{cmd} -c - The agent's own picker — either a slash command typed into the running TUI, or a CLI flag like
{cmd} -rthat opens a new terminal
While you are here, name the memory files: the per-project ones (AGENTS.md, say) and an optional global file. That is what the Memory panel will read and edit for this agent.
Then it is just another agent
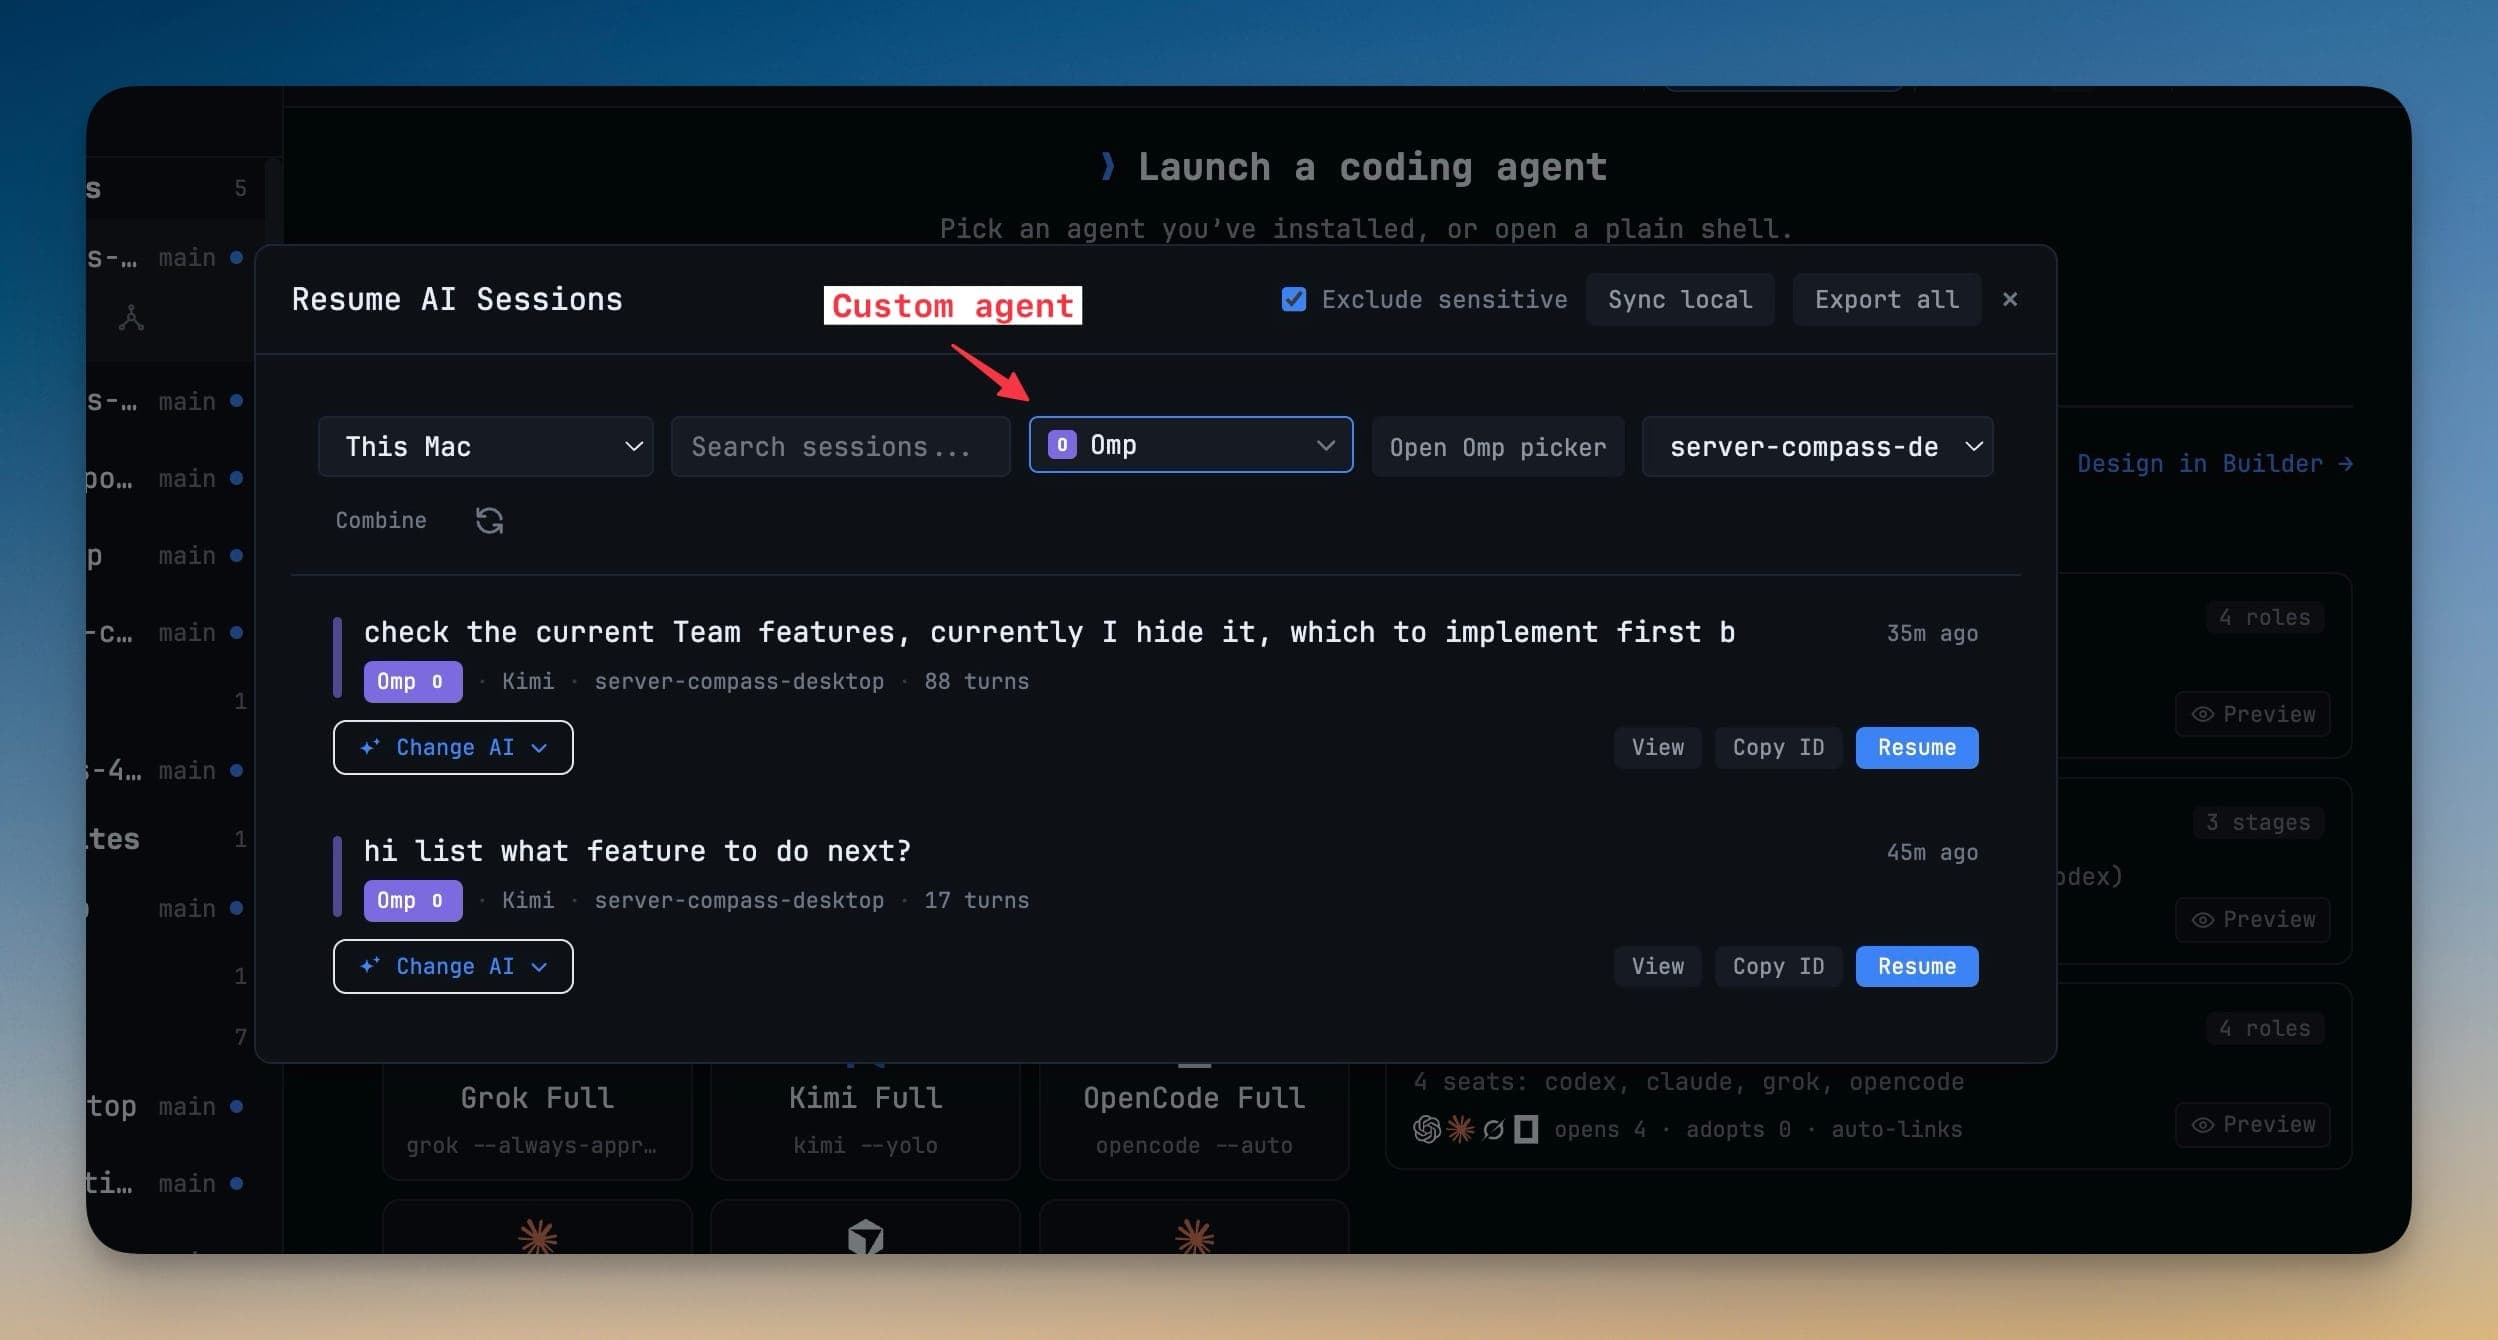
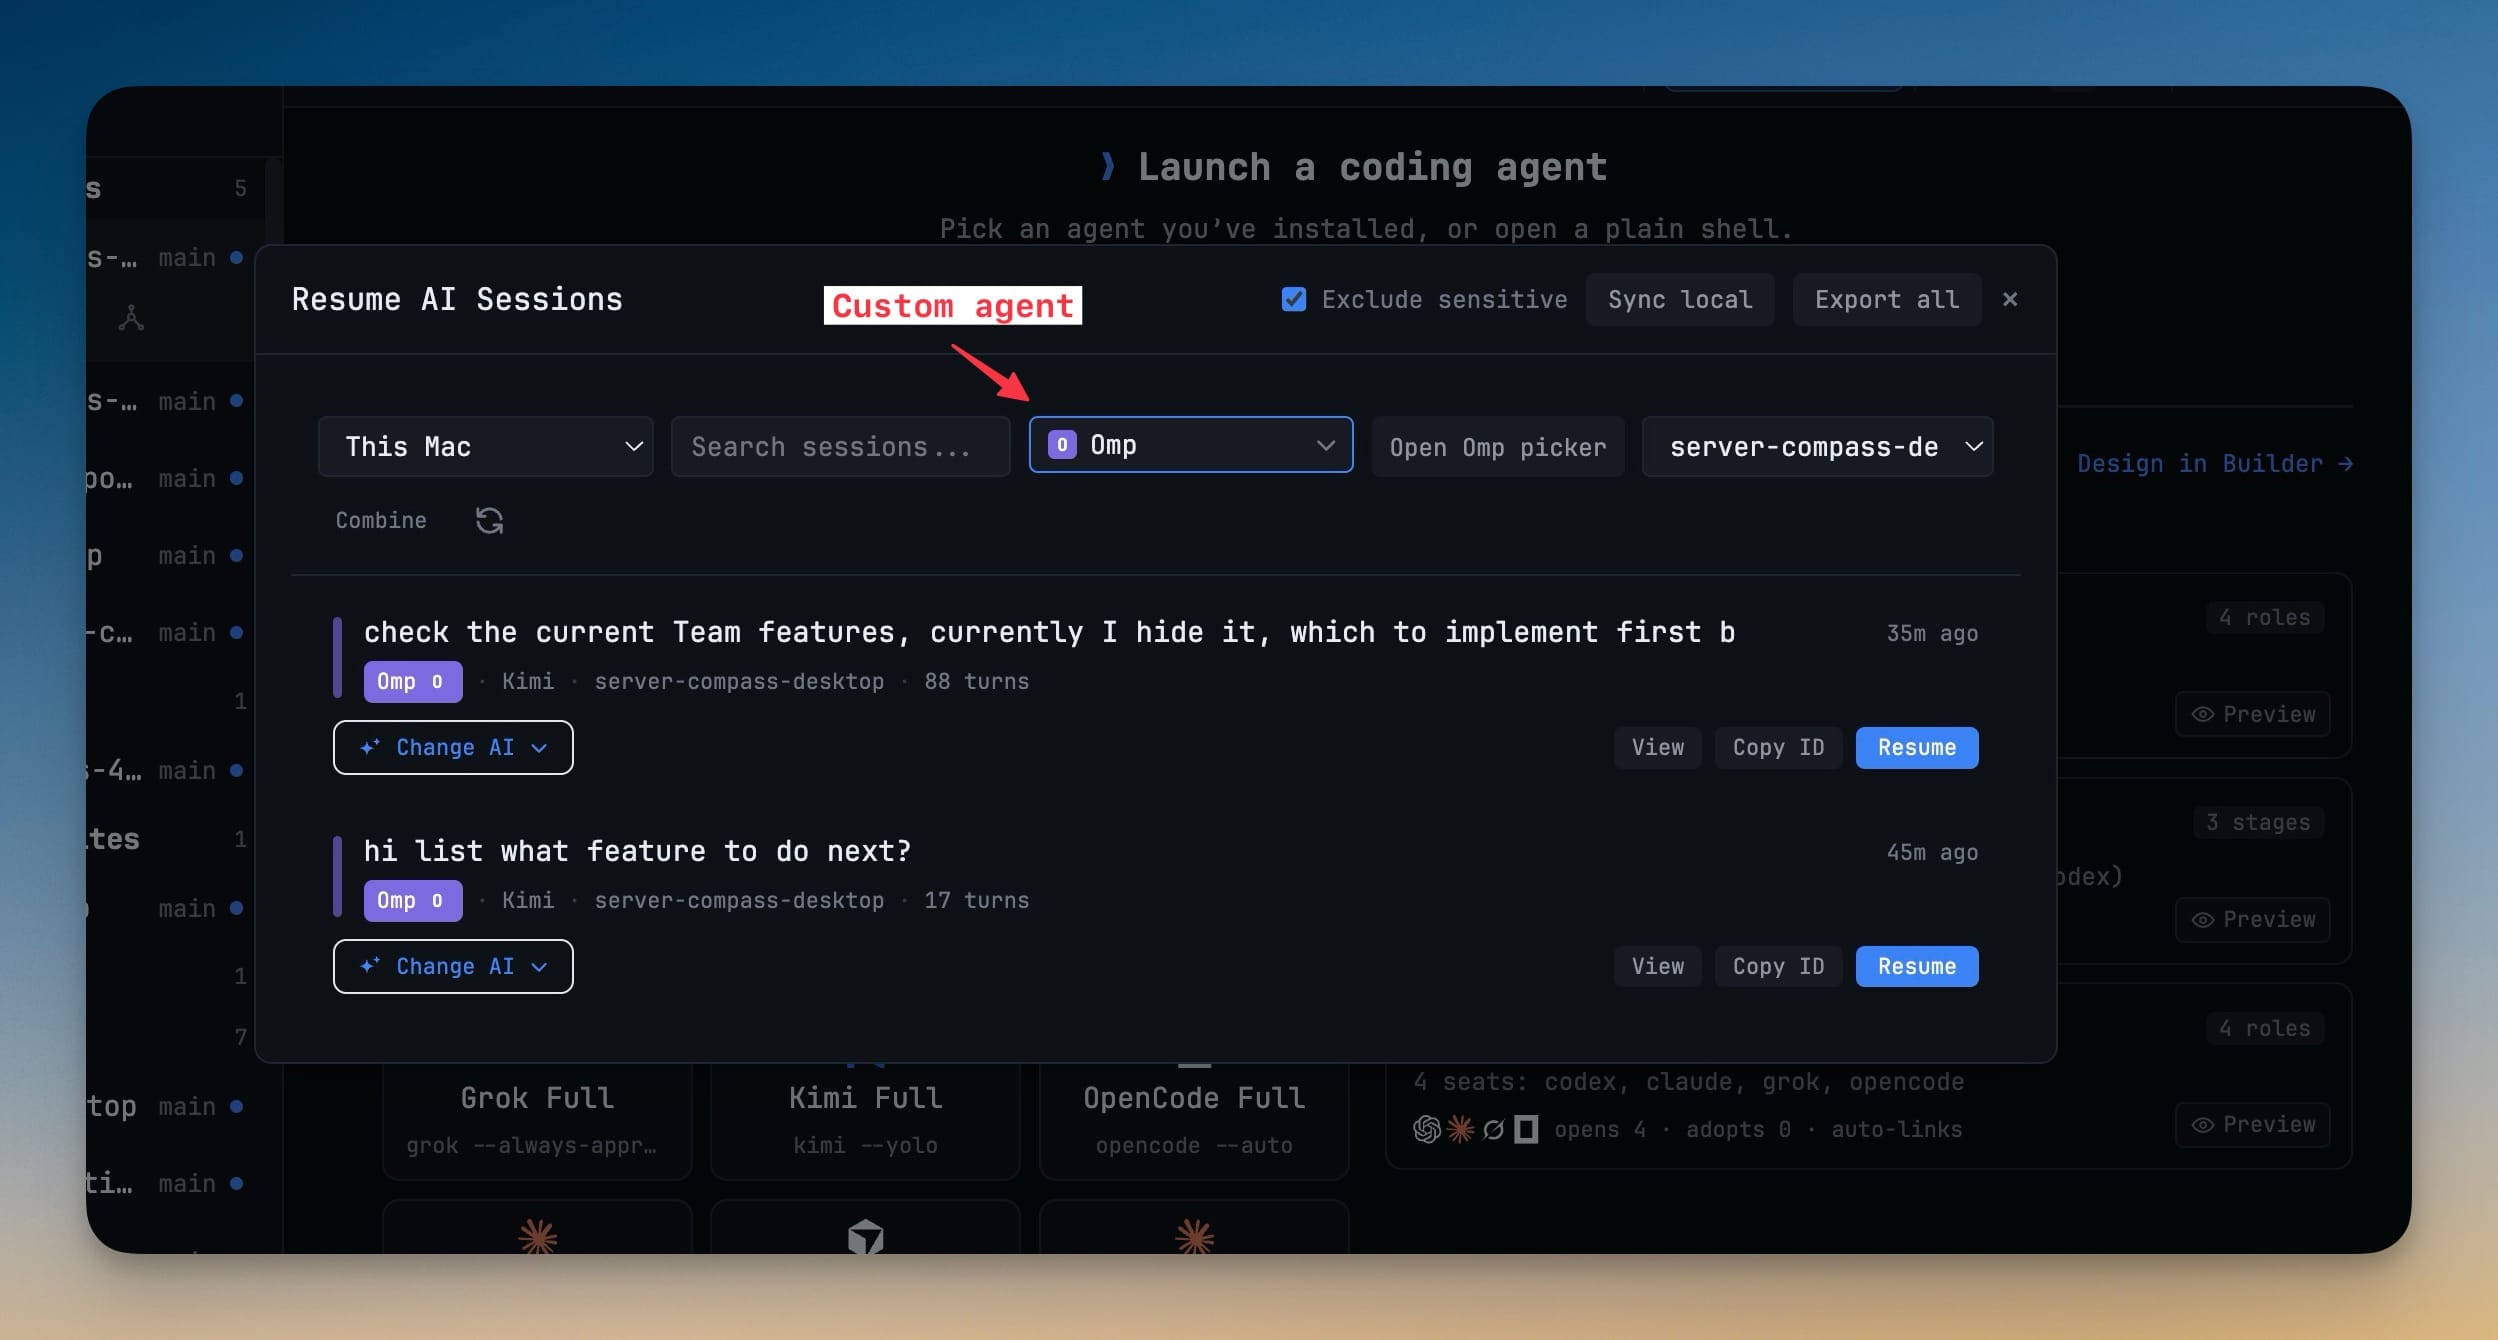
Filter Resume AI Sessions by it. Its transcripts appear with its badge and turn count, and Change AI will hand one of them to a different agent entirely.
One choice is worth getting right: Screen mode. Full-screen TUI lets the agent own the alternate screen and its own scrolling — the safe default for an unknown TUI. Inline transcript blocks the alternate screen so scrollback stays in 1DevTool, which is how Claude and Codex behave. If your agent prints a transcript, pick inline and you keep your scrollback.
Before vs after
| Task | Before | Now |
|---|---|---|
| Use a new coding CLI | Run it in a plain terminal | Register it once in Settings |
| Tell two agent tabs apart | Read the startup command | Its own logo and colour |
| Resume yesterday's conversation | Find the session id yourself | Resume, filtered to that agent |
| Move a conversation to another agent | Copy and paste the transcript | Change AI |
| Edit the agent's memory file | Open it manually in the editor | Memory panel |
| Get support for your CLI | File a request, wait for a release | Do it yourself, today |
Select terminals, then merge or close them
The other half of this release is about what happens once you have too many agents running.
Right-click a terminal and choose Select. Checkboxes appear on every visible tab and pane, including mosaic tiles, and the one you right-clicked starts checked. Ticking a box never switches the active terminal — you can select while something is still streaming.
From the action bar you can then Merge. It combines the selected transcripts into a single prompt and hands it to an existing AI terminal or a new one. Before anything is sent, the dialog lists every source with its message count and flags the ones it could not attribute to a session — those contribute no context, and you are told rather than left to wonder. Tick close the merged terminals afterwards and the sources clean themselves up.
Or just Close the whole selection. Select all, Done and Escape leave the mode.
Switching worktrees without opening Git Client
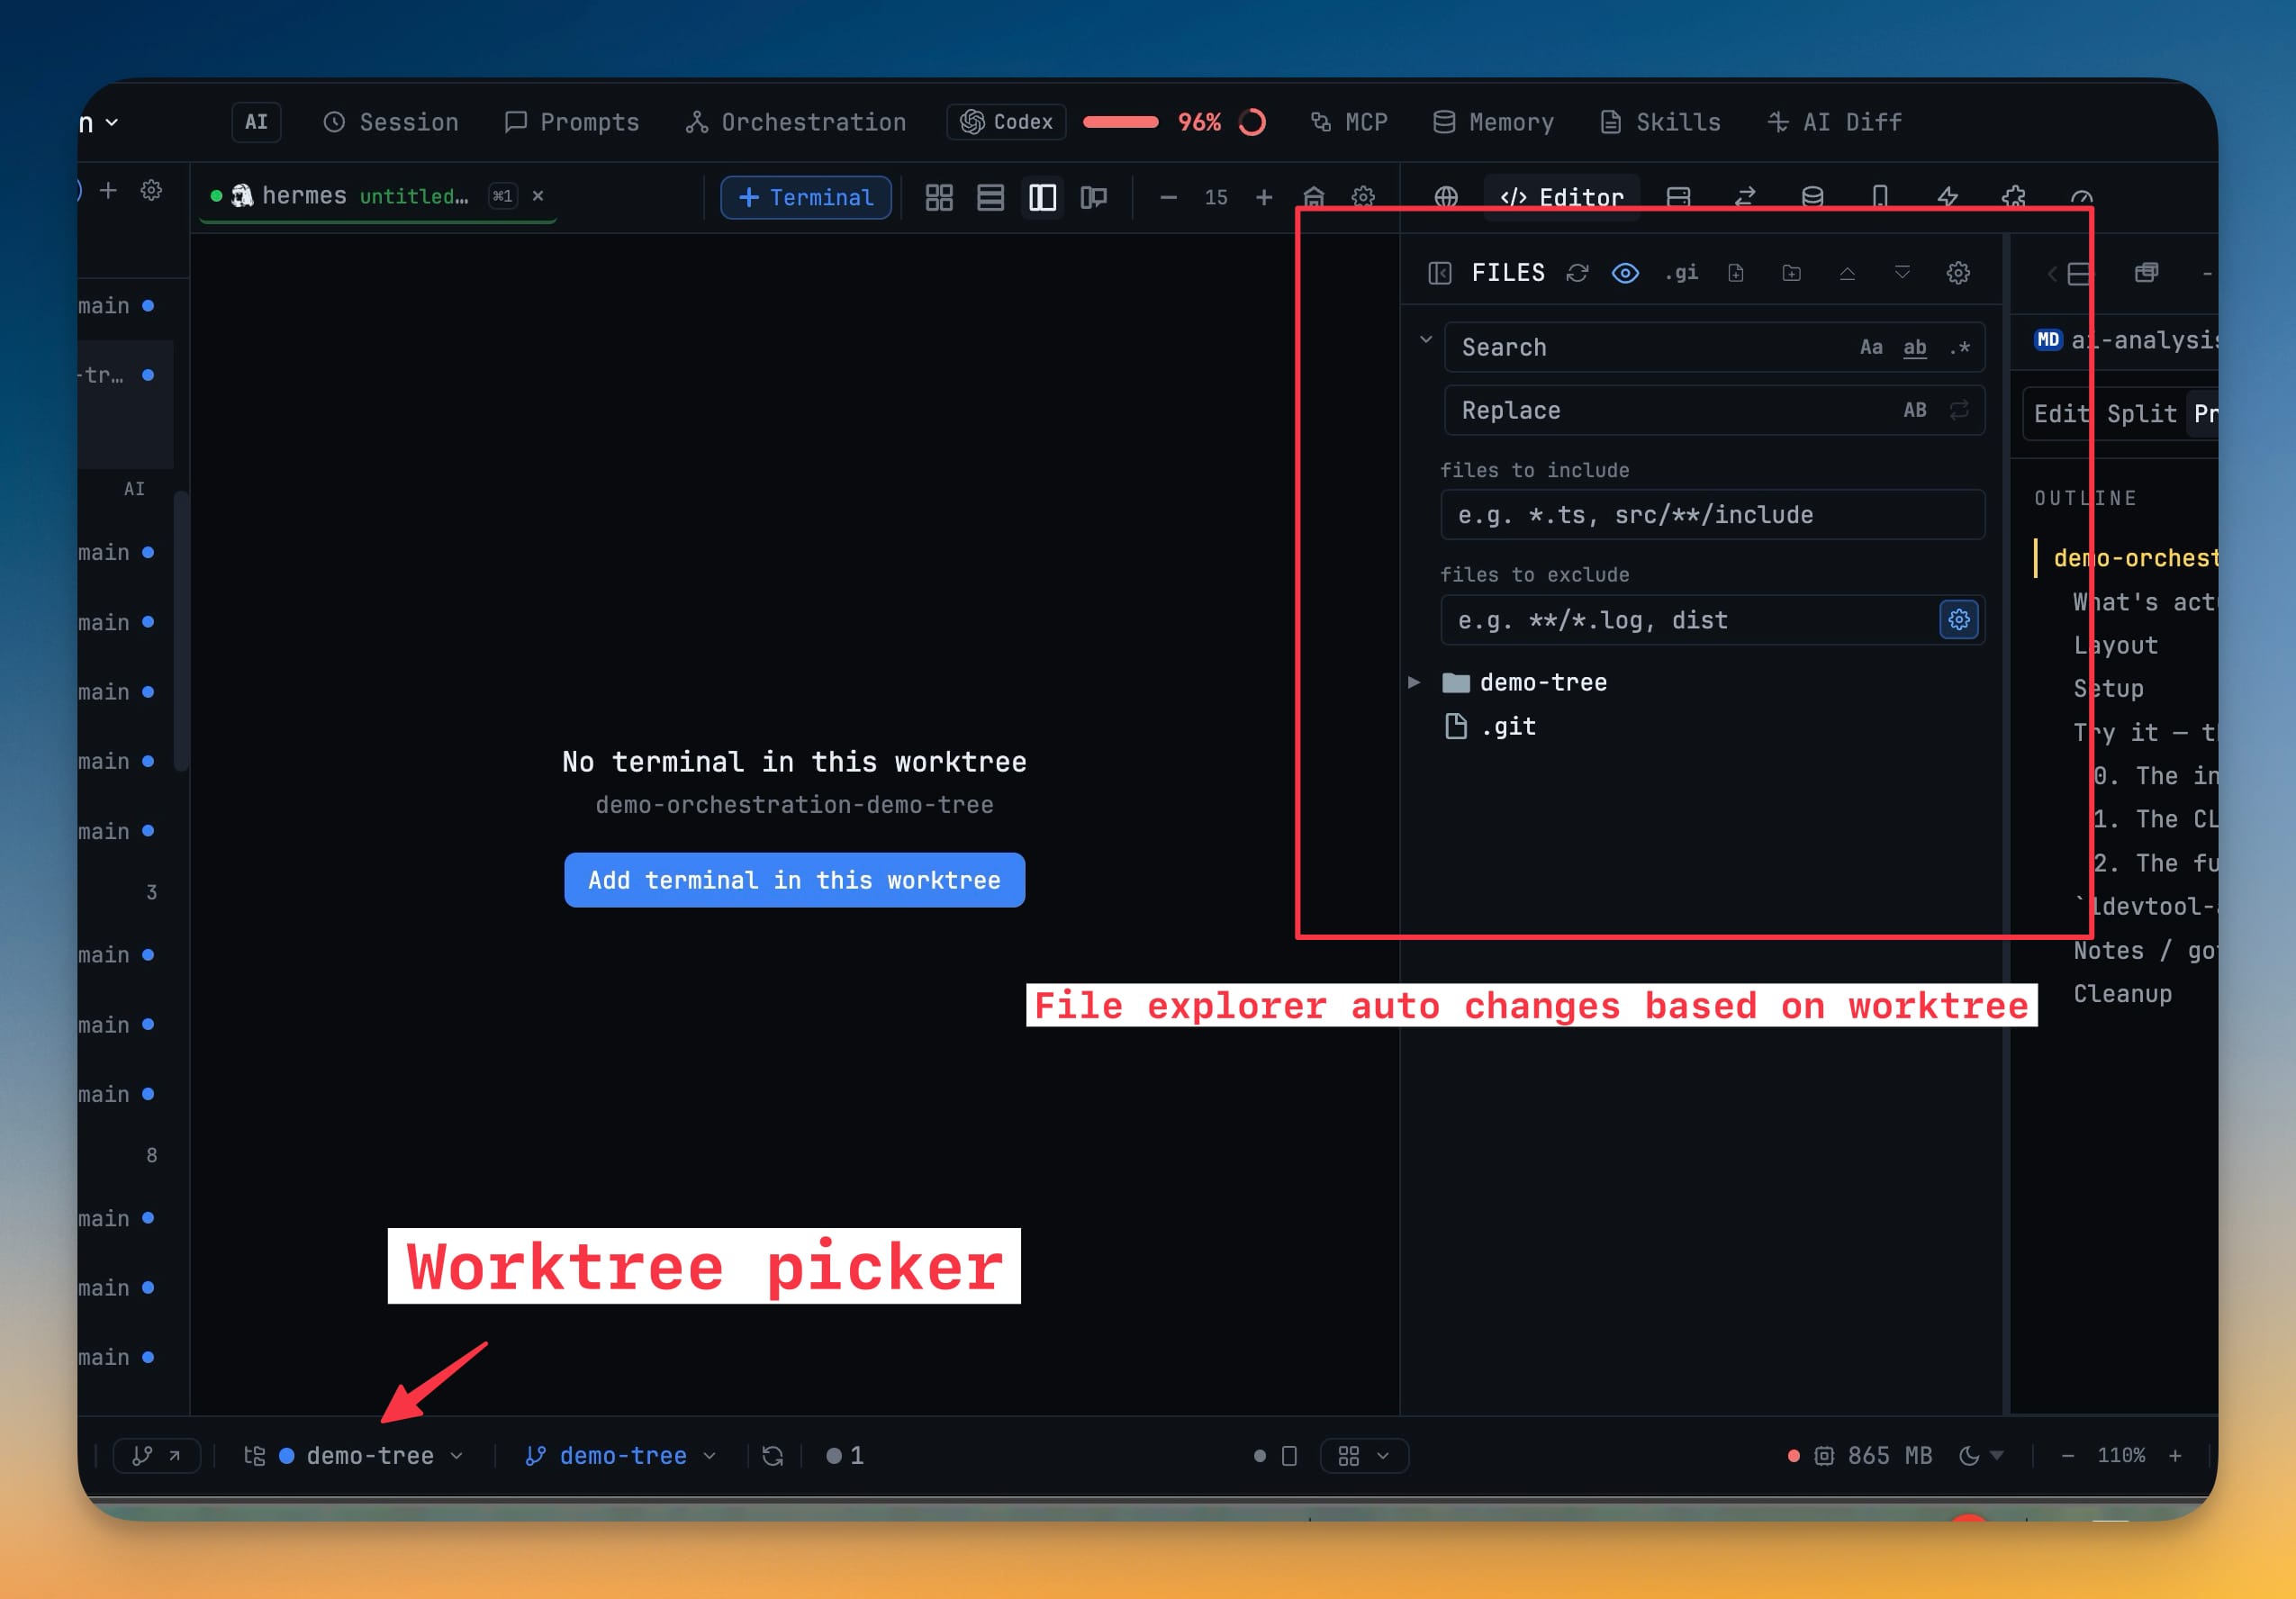
If a project has linked worktrees, the status bar now names the active checkout next to the branch chip, with its colour and its primary, locked and dirty marks, and switches from there.
The part that matters is what happens after the switch: 1DevTool brings forward a terminal that already belongs to that worktree instead of stranding you on a tab from a different checkout. And a worktree with no terminals of its own says so, rather than showing you a leftover pane from somewhere else.
Reading Mode is a real split now
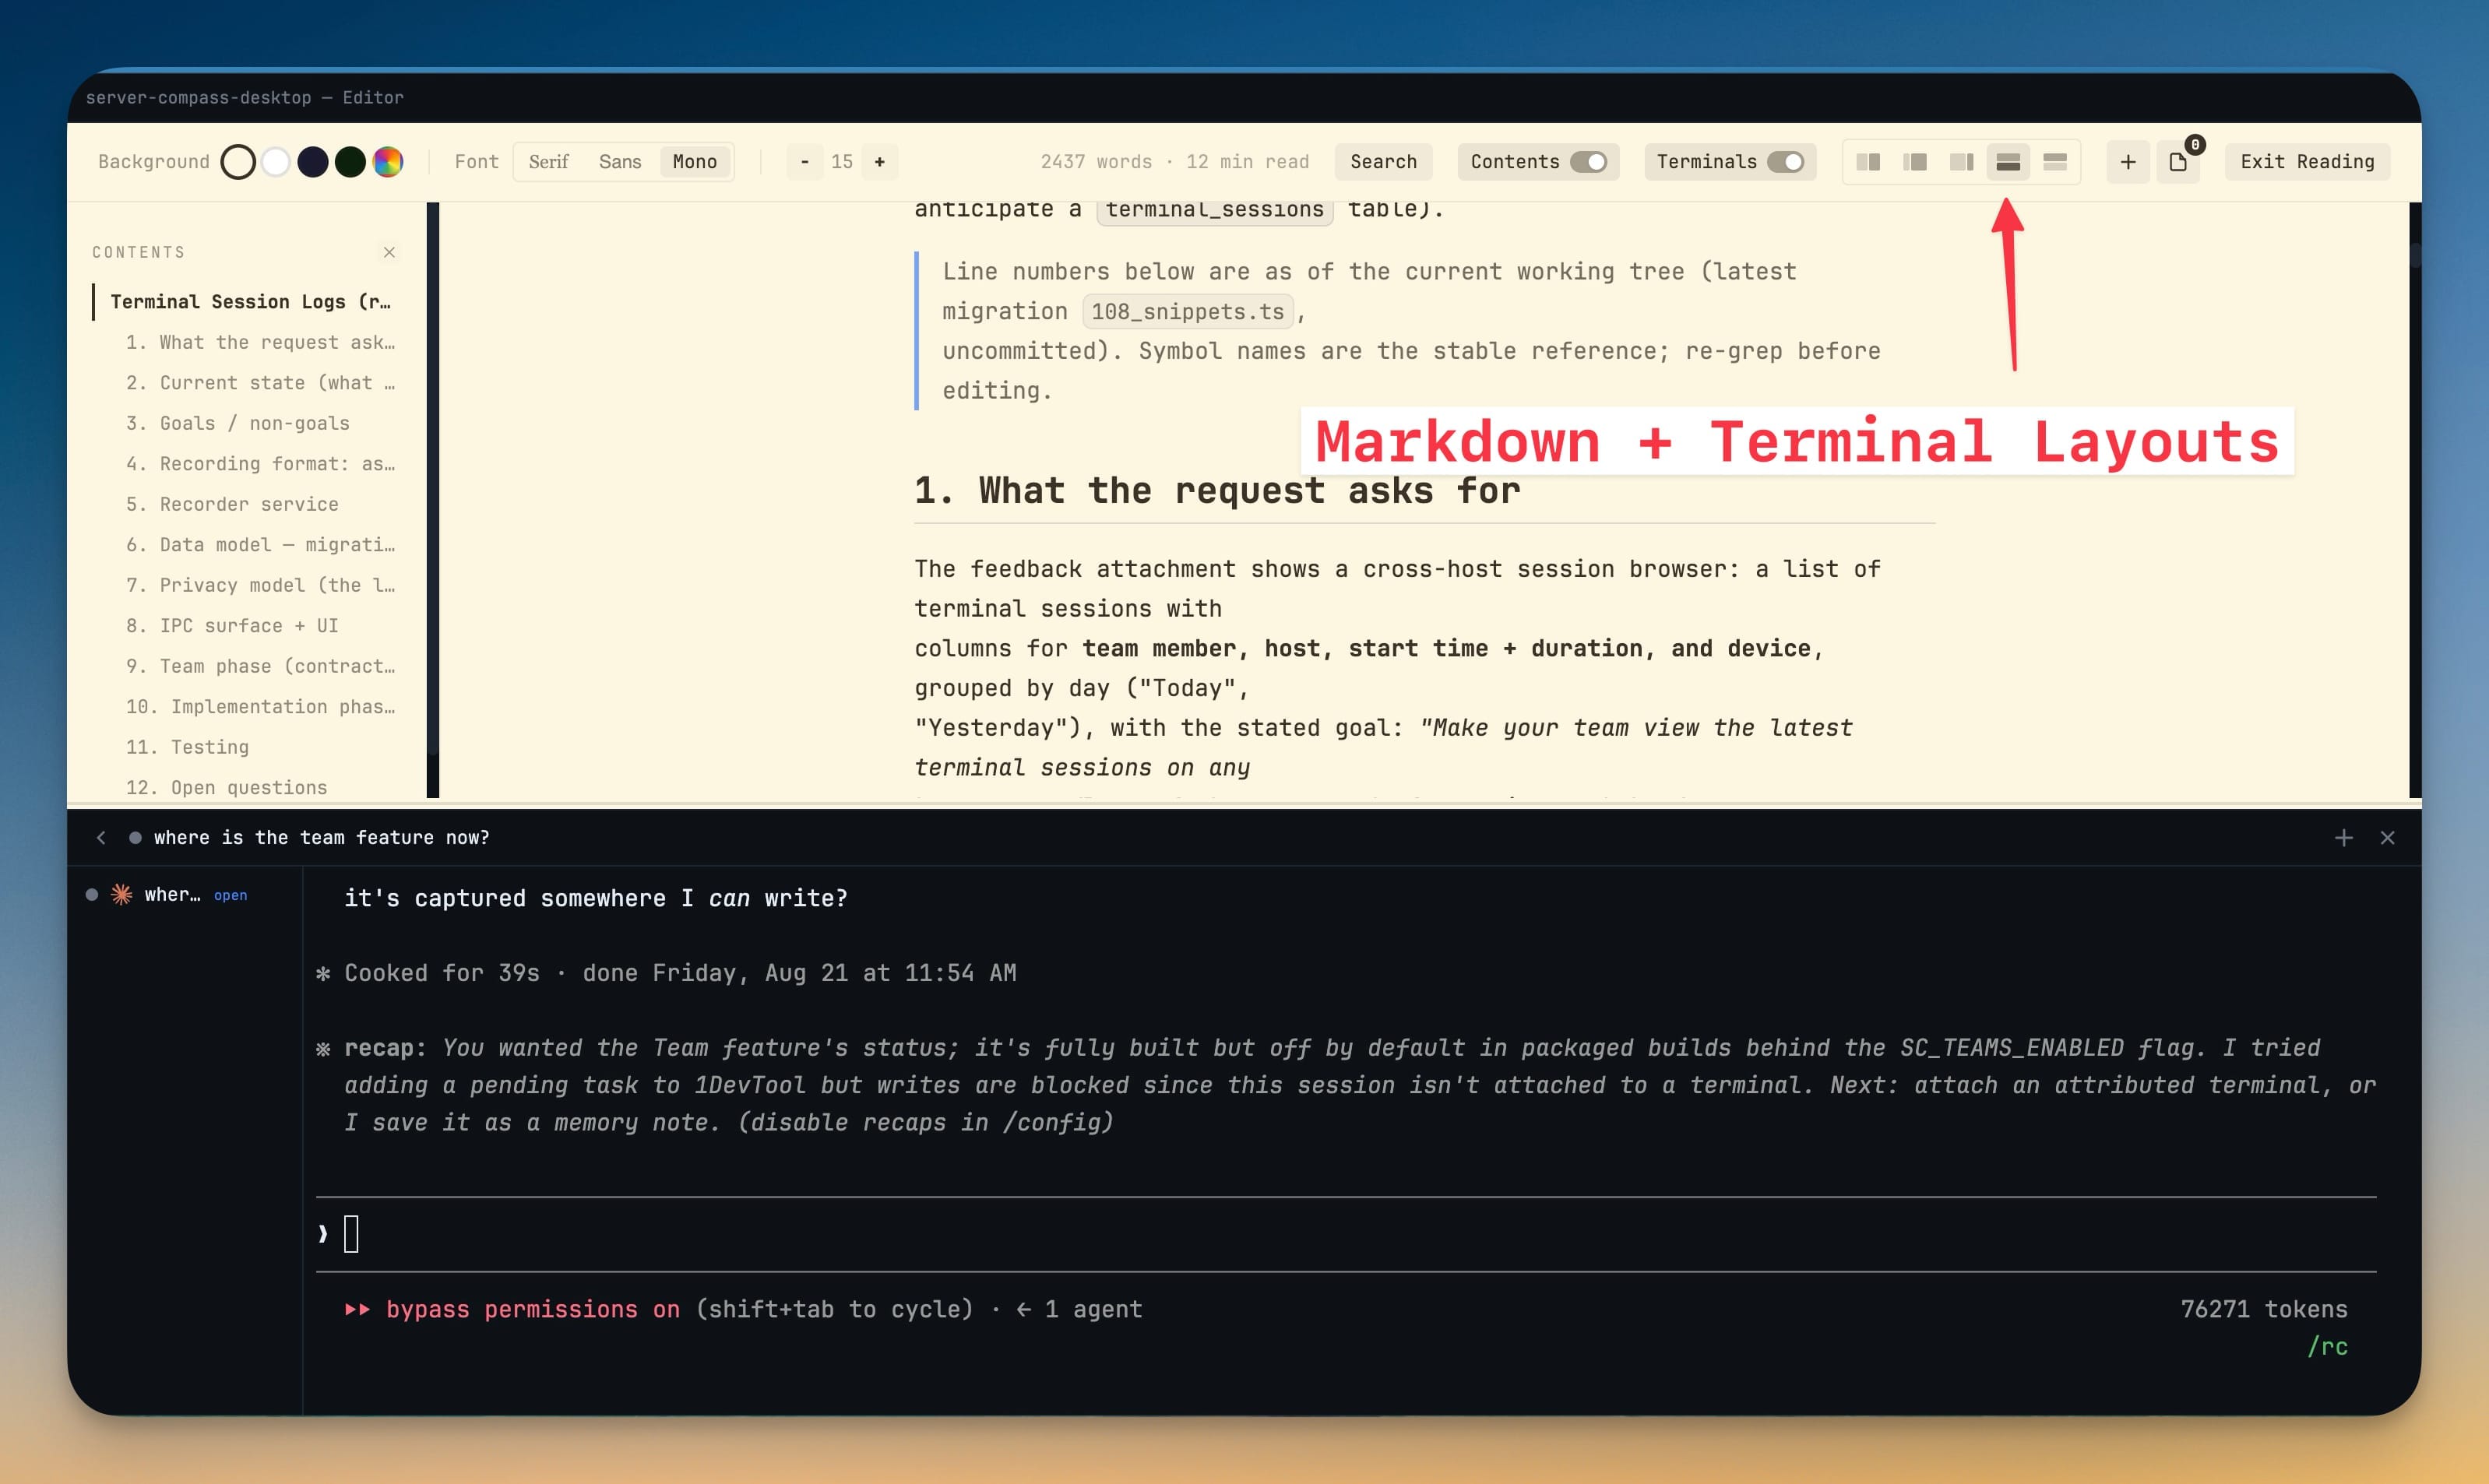
Reading Mode used to float a terminal dock on top of the document you were reading. Now markdown and the terminal are two panes in a split you control: 5 : 5, 3 : 7, 7 : 3, markdown above the terminal, or terminal above markdown. Drag the sash to fine-tune it, and the layout you settle on is remembered.
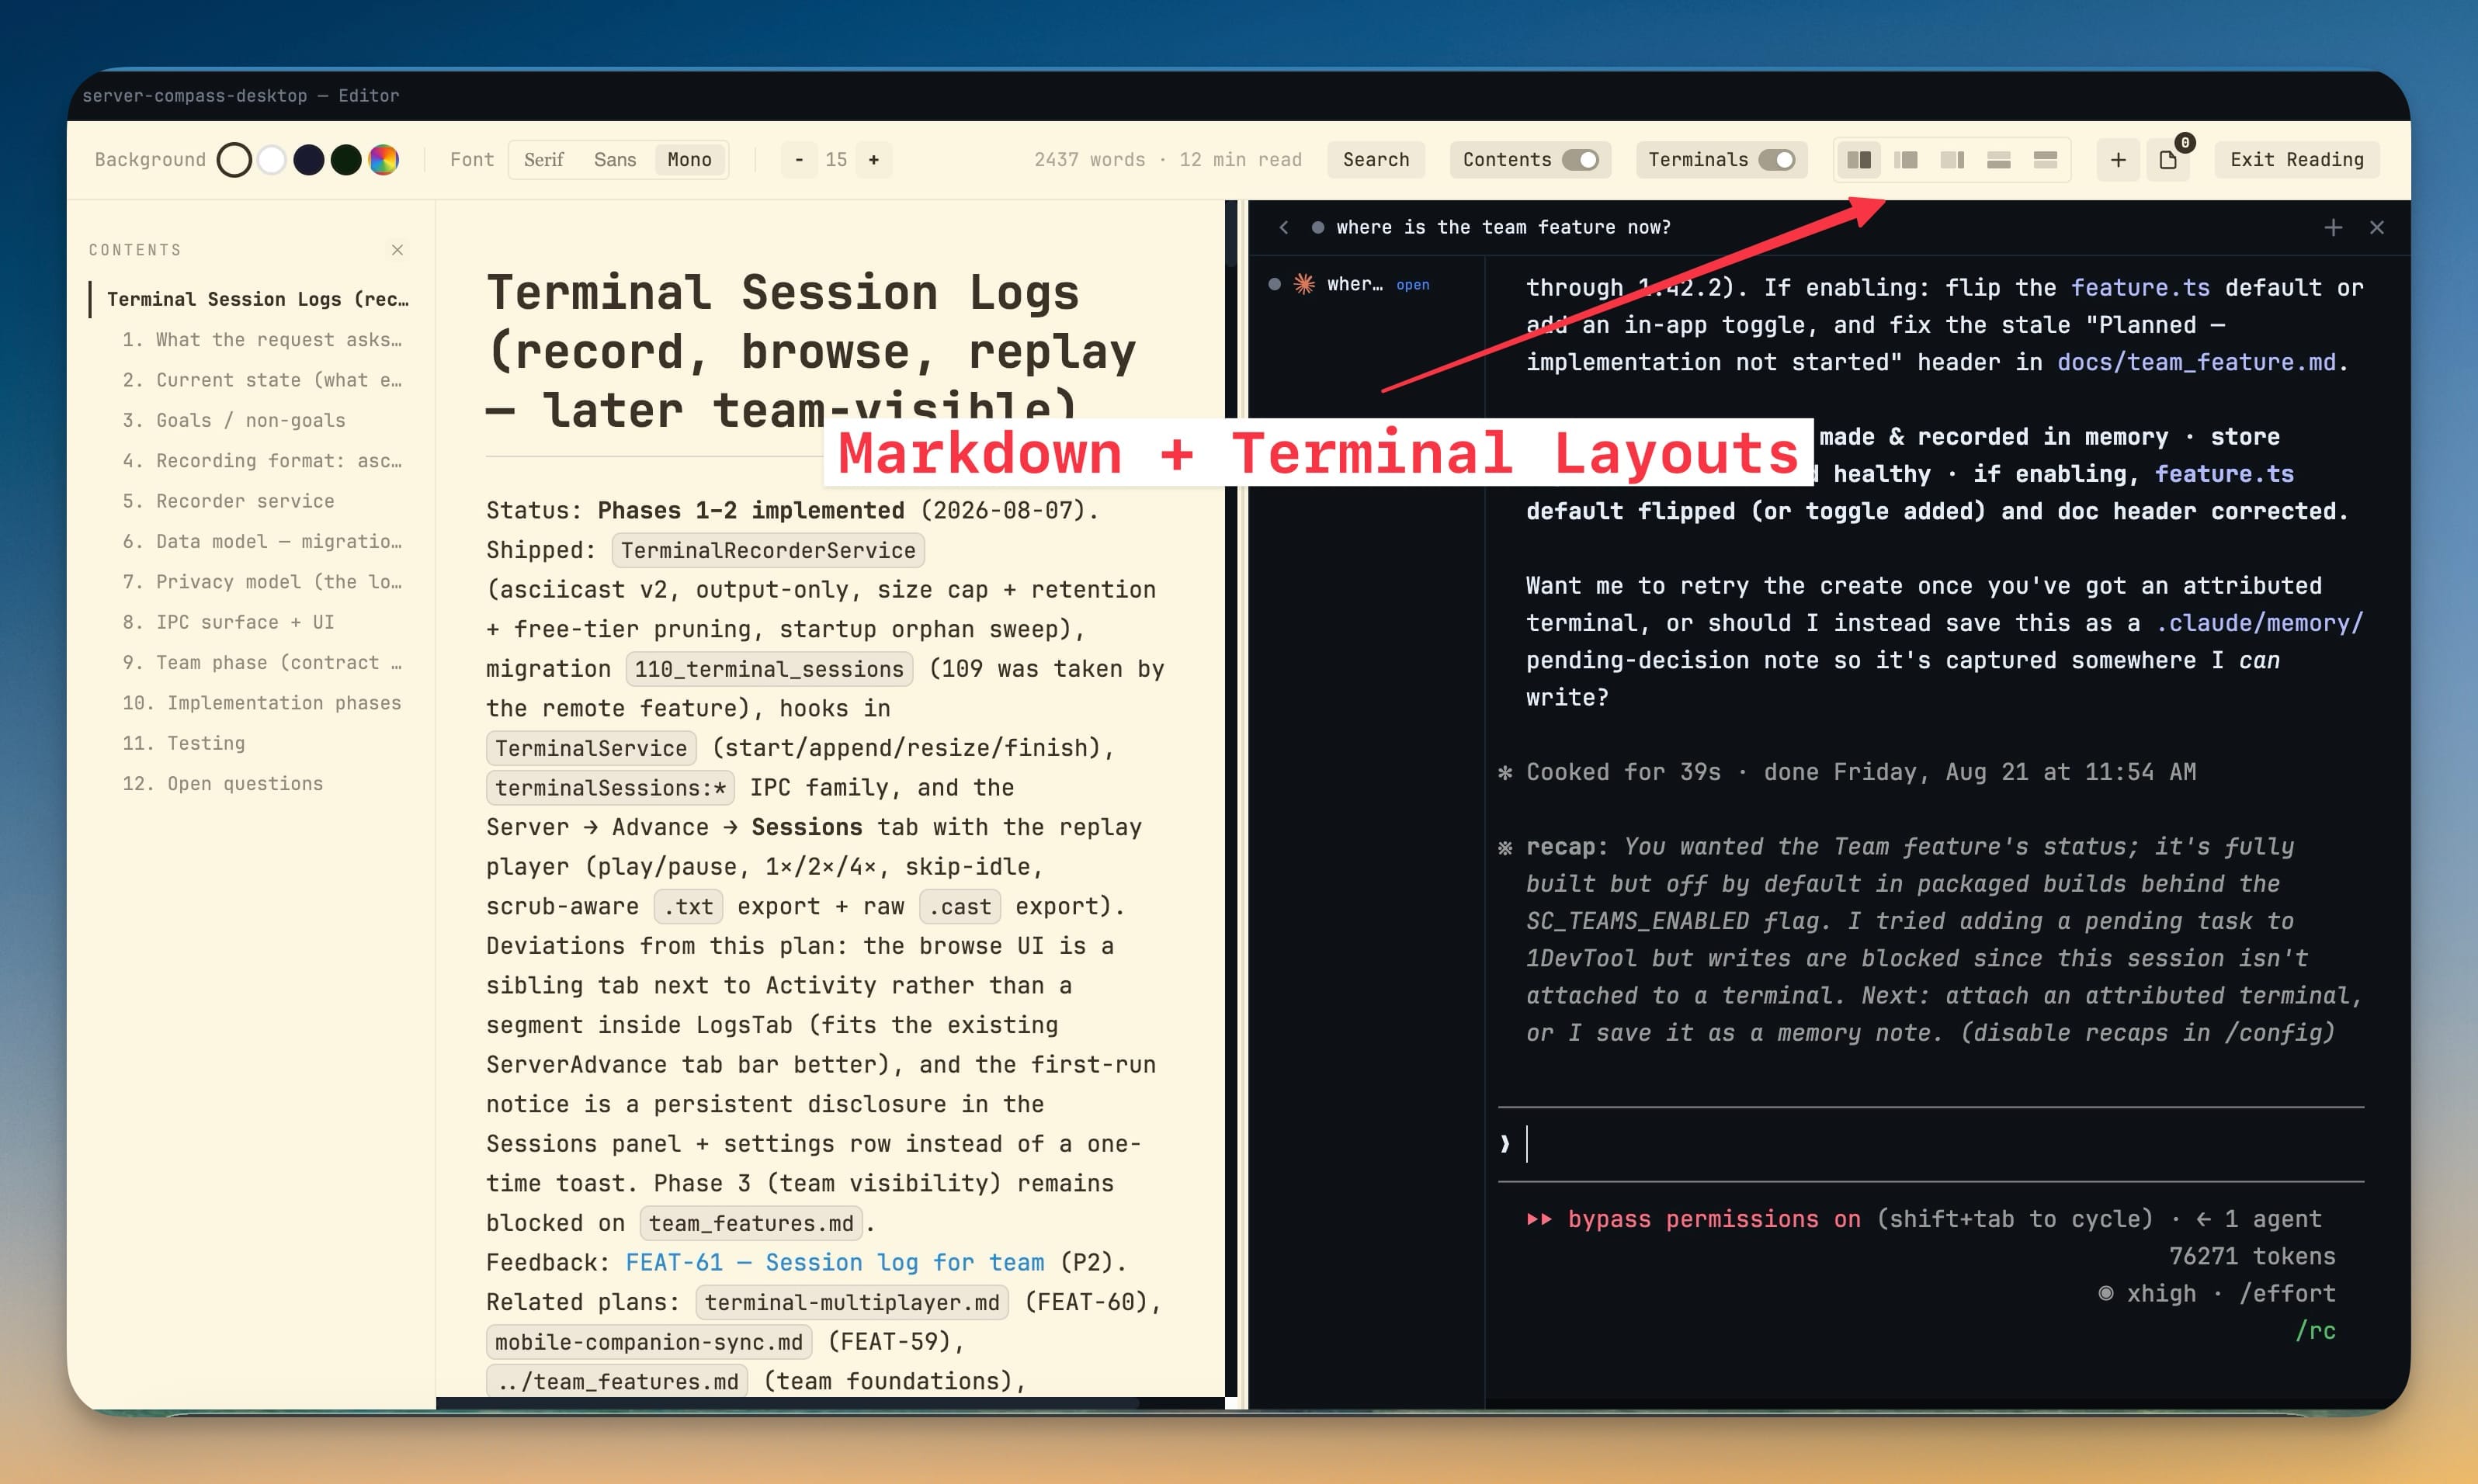
Stack it instead when the document has long lines and you would rather give it the full width.
Who benefits most
If you run a fork or a niche CLI. Pi forks, in-house wrappers, a CLI that shipped last week — these never justified a dedicated integration, and now they do not need one.
If you juggle many agents at once. Selection mode turns twelve terminals from a cleanup chore into one merge and one close.
If you work across worktrees. The status bar picker plus worktree-aware terminal focus removes the most common way to run a command in the wrong checkout.
Try it
Update to v1.70.0, open Settings → Terminal → Commands, and pick the CLI you have been running in a plain shell. Give it a name, a colour, and a session folder, and press Test. Five minutes of setup, and the agent you already liked stops being a second-class citizen in your workspace.