Git Worktrees
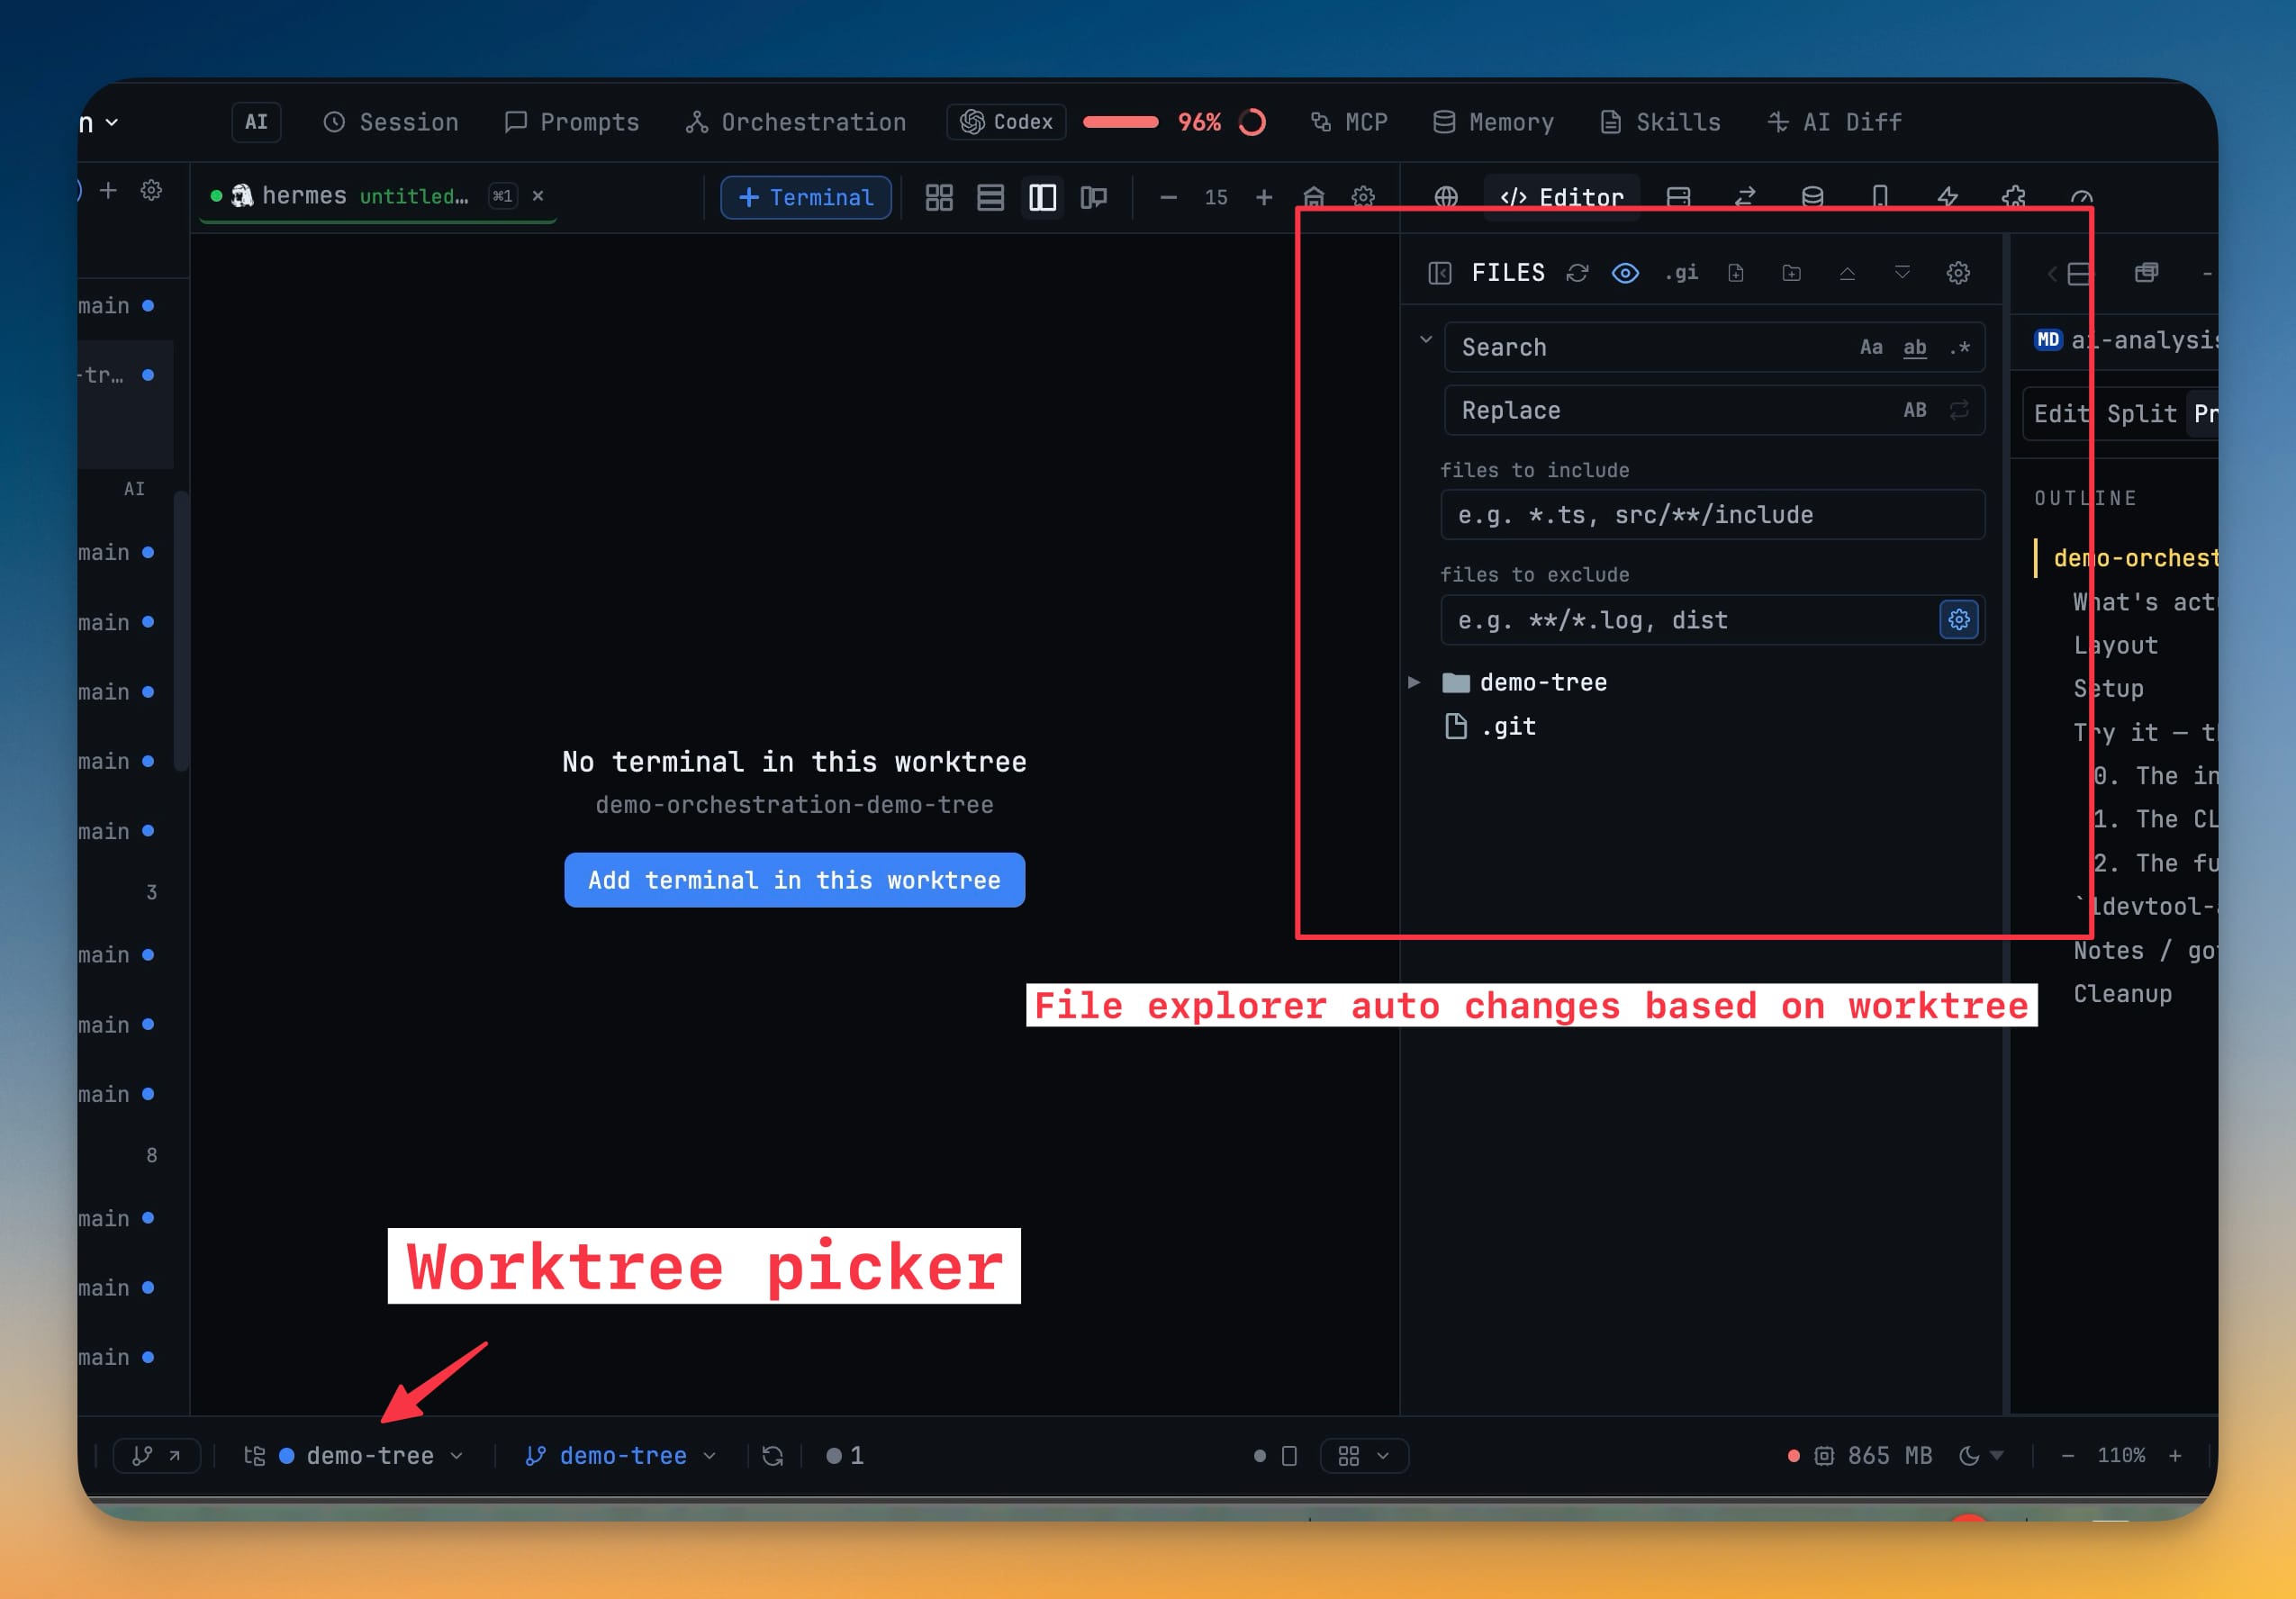
Run multiple branches of the same repo side-by-side — each with its own files, terminals and dirty state — without ever touching `git stash`. The status bar names the active checkout next to the branch chip and switches between worktrees without opening Git Client, bringing forward a terminal that already belongs to the one you picked.
More Screenshots
Click any image to zoom in
Why You Need This
How this feature boosts your daily productivity
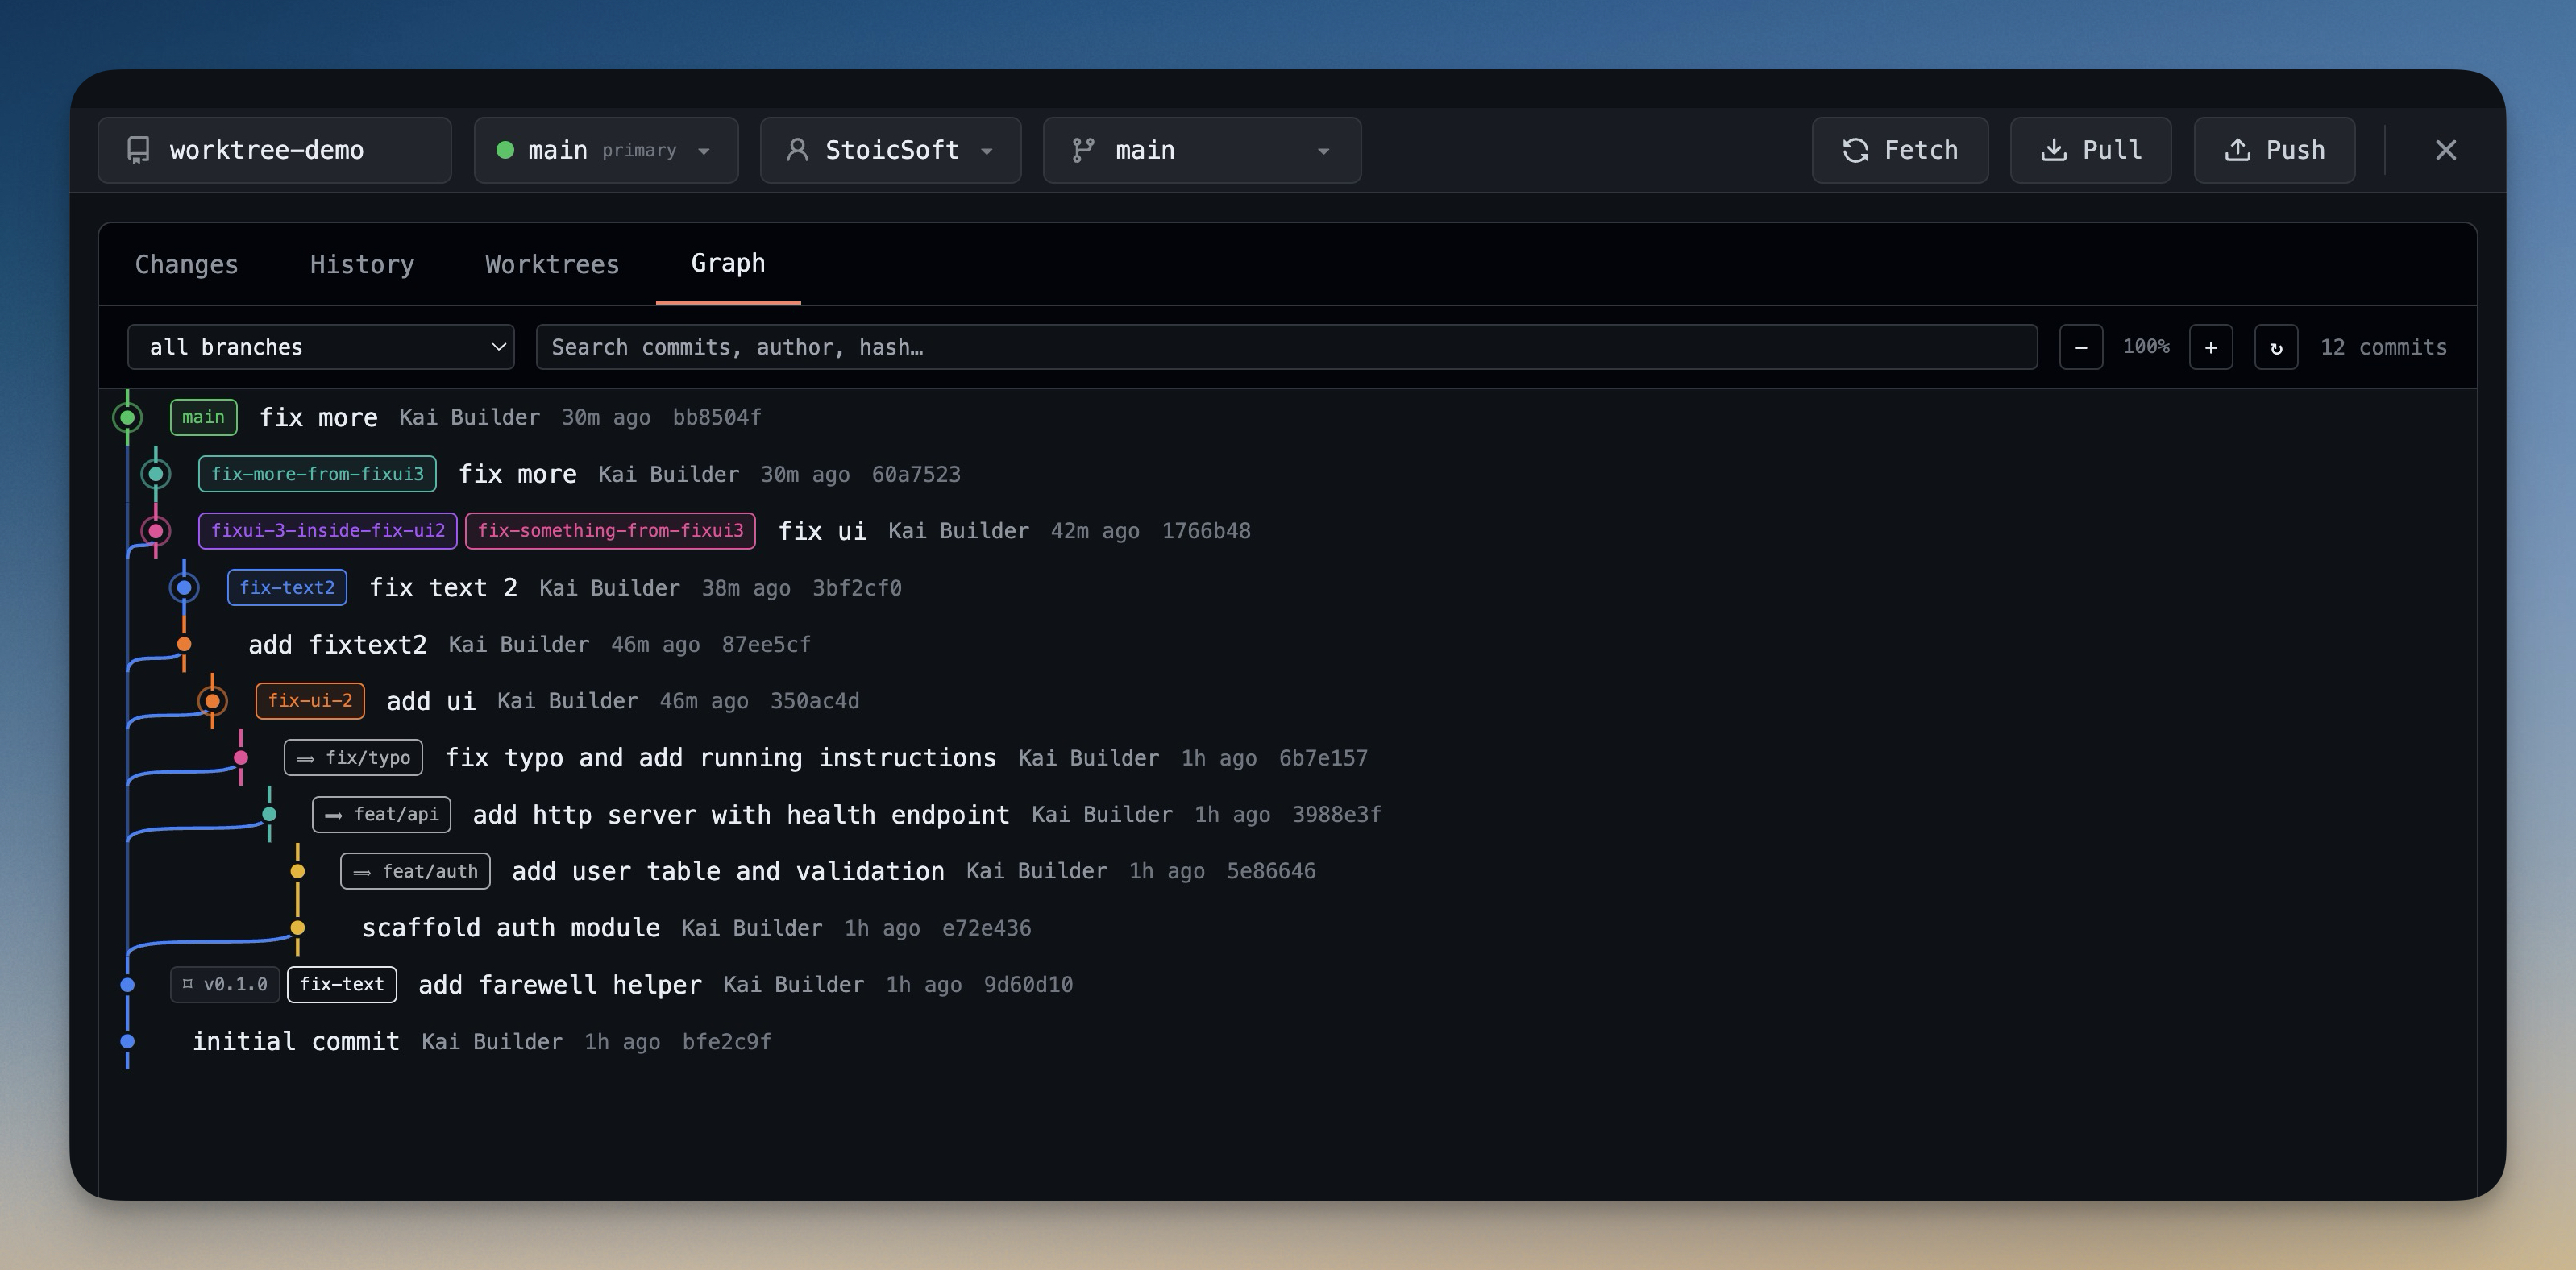
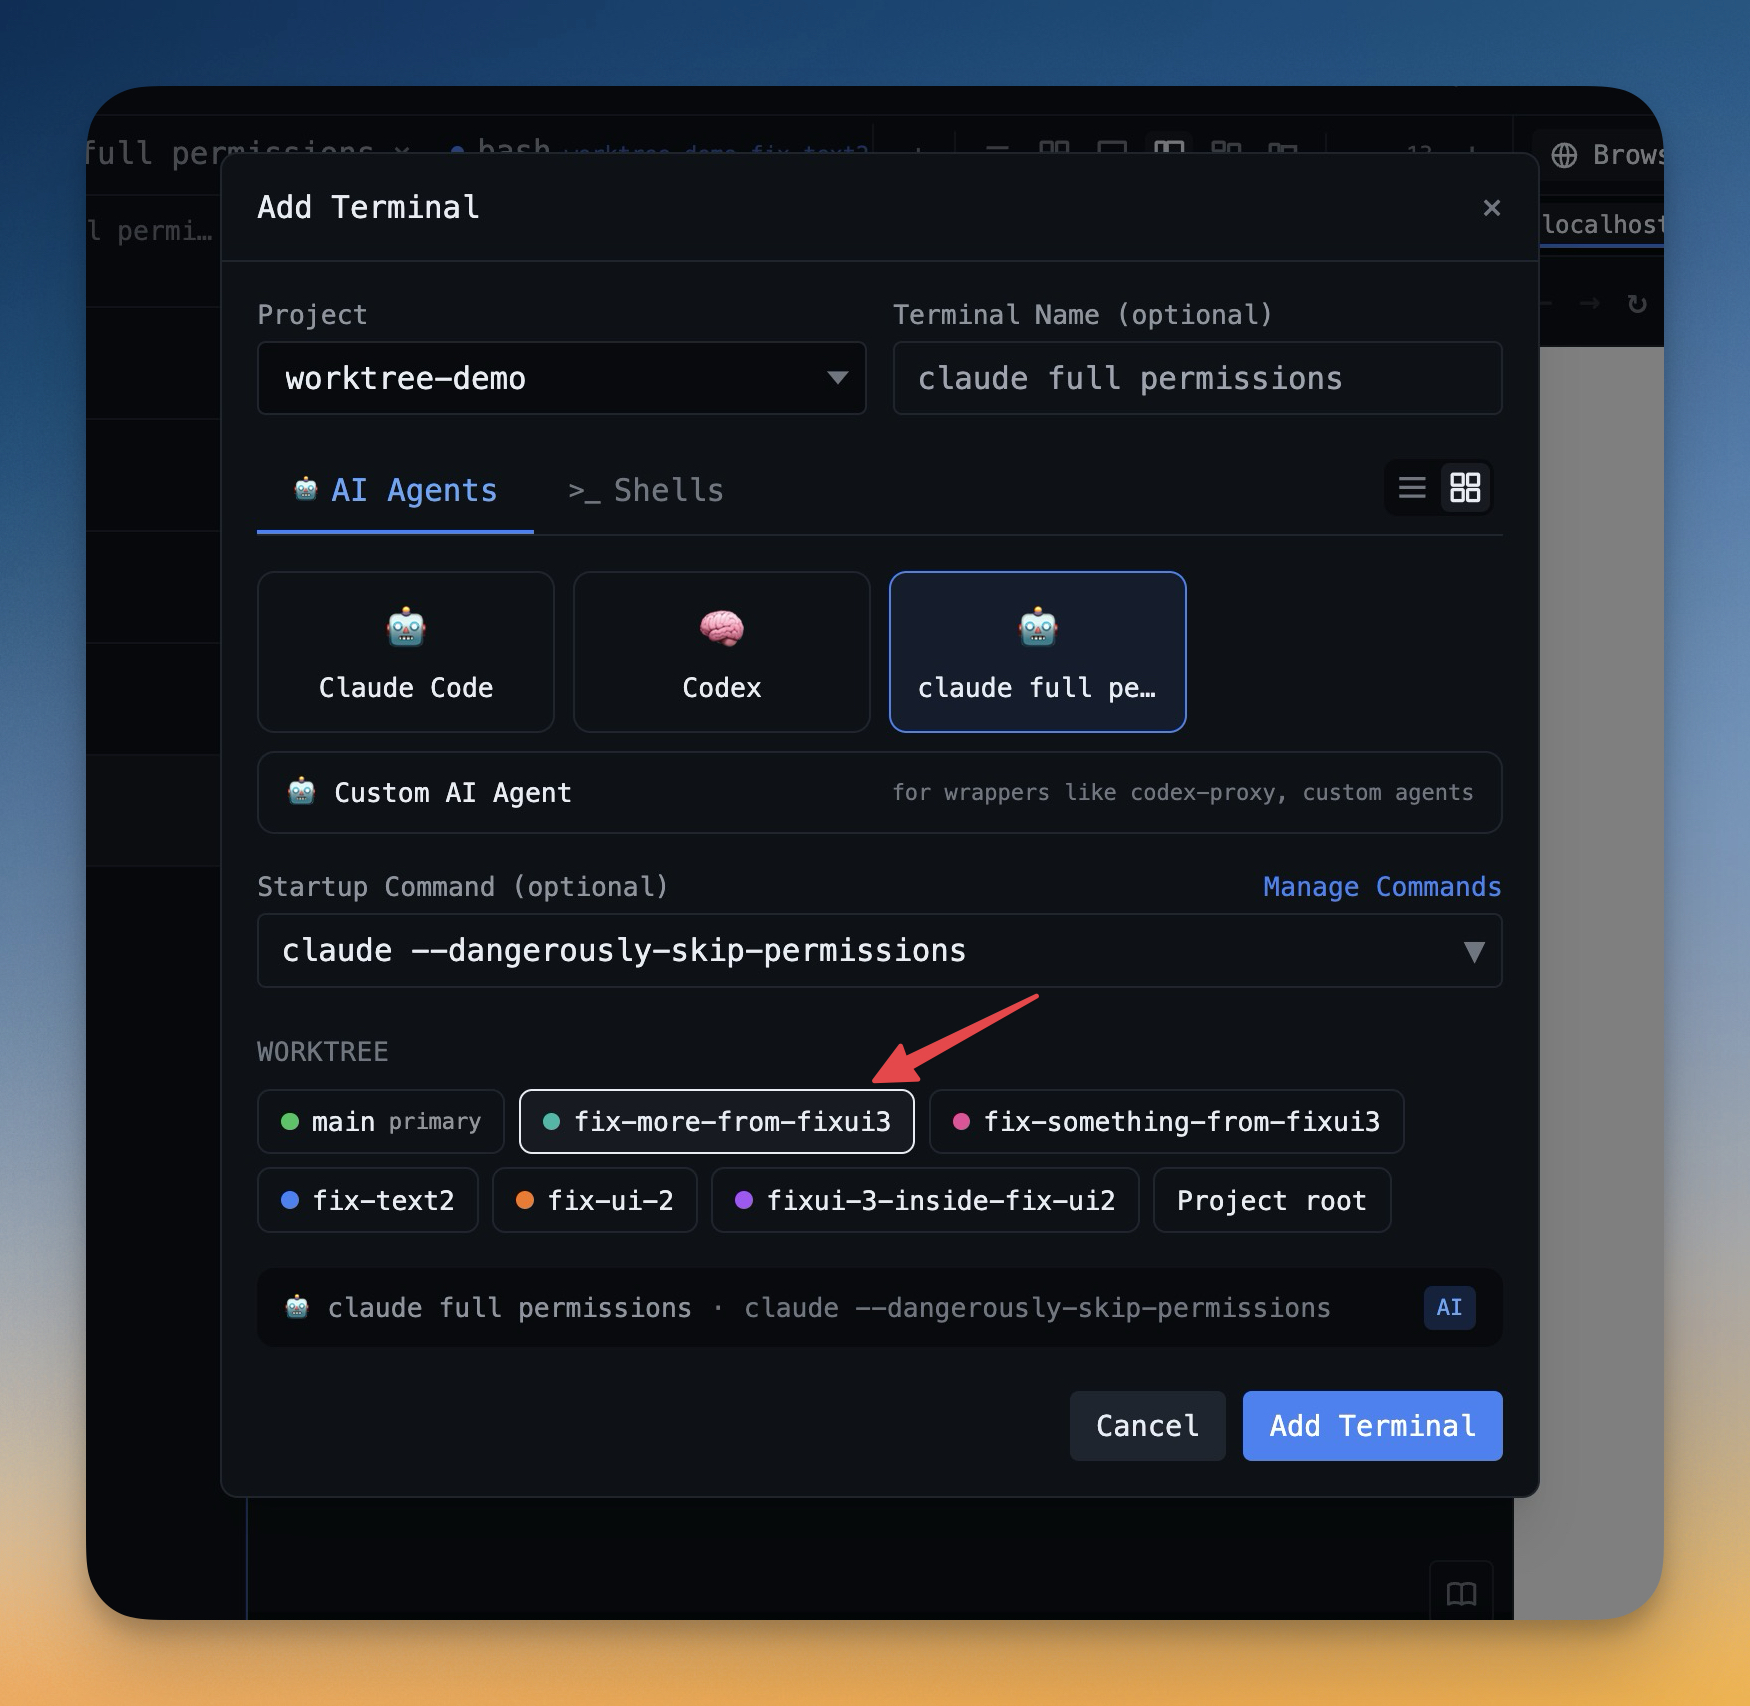
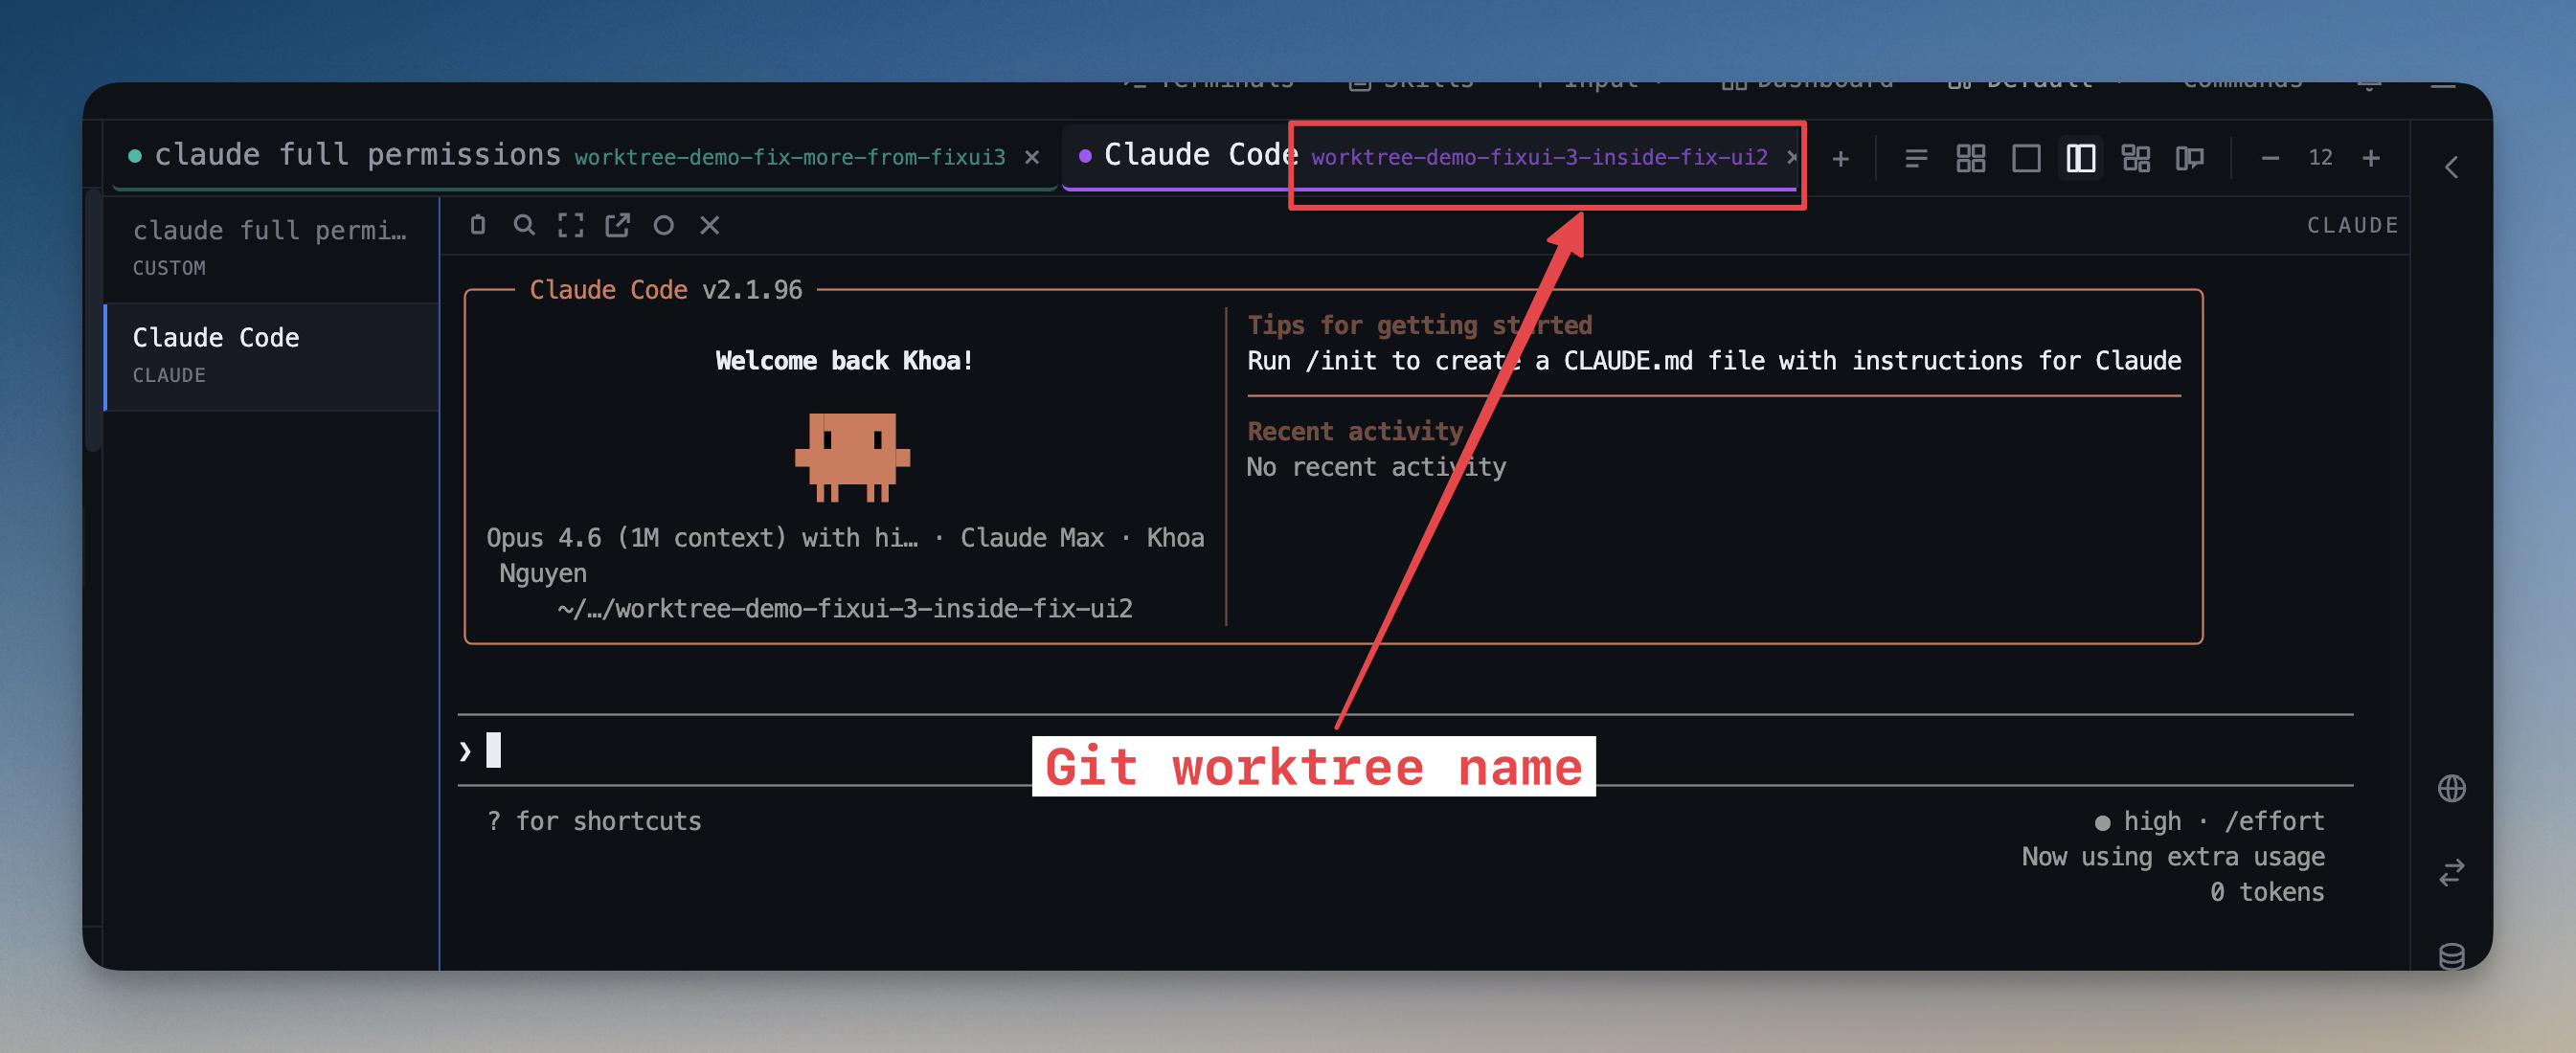
You're mid-feature when an urgent hotfix lands. The standard git workflow forces you to stash your work, switch branches, fix the bug, switch back, and pop the stash — losing your editor state, your scrollback, and your context every time. Git Worktrees let you spin up linked working copies of the same repo, one per branch, each with its own files and terminals. The new Worktrees tab in the Git Client shows every worktree as a card with its branch name, dirty state badge, lock state, colored dot, and the list of terminals running inside it. Click "+ Terminal" on a worktree card and the Add Terminal dialog opens with that worktree pre-selected — and the picker defaults to whichever worktree your currently focused terminal is using, so opening a new tab in the same worktree is a single click. Lock worktrees to protect important ones from accidental removal, prune stale worktrees in one click when you delete a folder by hand, and right-click any commit in the visual git graph to spin up a new worktree from that exact revision — perfect for hotfixes off an old release. Every git command in the Git Client now runs against the active worktree, not just the project root, and dirty-state badges poll every five seconds so editing a file in one worktree shows up immediately in the others. Switching is now a status-bar affordance rather than a trip through Git Client: the active checkout shows its colour and its primary, locked and dirty marks, and picking another brings forward a terminal that already belongs to it instead of stranding you on a tab from a different tree — the most common way a command ends up running in the wrong checkout. A worktree with no visible terminals says so and offers to add one, rather than showing a leftover pane from somewhere else.
How It Works
Get started in 4 simple steps
Create linked worktrees for the repo
Git Client lists the repo’s worktrees with their branch, colour, and primary, locked and dirty marks, and adds new linked checkouts without touching git stash.
Switch from the status bar
When a project has worktrees the status bar names the active checkout beside the branch chip; clicking it opens the Switch worktree list.
Land on a terminal that belongs there
Switching brings forward a terminal that already belongs to that worktree instead of leaving you on a tab from another checkout — the usual way a command lands in the wrong tree.
Start clean in an empty one
A worktree with no visible terminals shows "No terminal in this worktree" and an Add terminal in this worktree button, rather than a leftover pane from somewhere else.
Without 1DevTool
The manual way vs. the 1DevTool way
The Hard Way
The 1DevTool Way
Key Capabilities
Everything included with Git Worktrees
Why It Matters
The productivity impact of having project management built into your workspace
The Hotfix Costs You Nothing
An urgent fix opens in its own checkout while your feature work stays exactly as you left it — editor state, scrollback and dirty files intact.
Switch Without The Detour
The active checkout lives in the status bar next to the branch chip, so changing trees no longer means opening Git Client first.
The Right Tab Comes With You
Switching brings forward a terminal that already belongs to that worktree, closing off the most common way a command runs in the wrong checkout.
Empty Means Empty
A worktree with no terminals says so and offers to add one, instead of leaving a stale pane from another tree on screen looking current.
More in Project Management
Other features in this category you might find useful
Multi-Project Workspace
Work on multiple projects simultaneously with instant switching. Entire workspace state is preserved per project.
Smart File Explorer
Real-time file tree with type icons, .gitignore filtering, search, and right-click context menus.
Per-Project Code Intelligence
Spawn real typescript-language-server, gopls, pyright, rust-analyzer, clangd, solargraph, intelephense, or sourcekit-lsp for the projects you opt into — with project-aware errors and zero false positives.
Color-Coded Projects
Assign accent colors to each project for instant visual identification across your workspace.
Ready to boost your workflow?
Download 1DevTool for free and experience Git Worktrees along with 322 other features — all in one app.