Screenshots
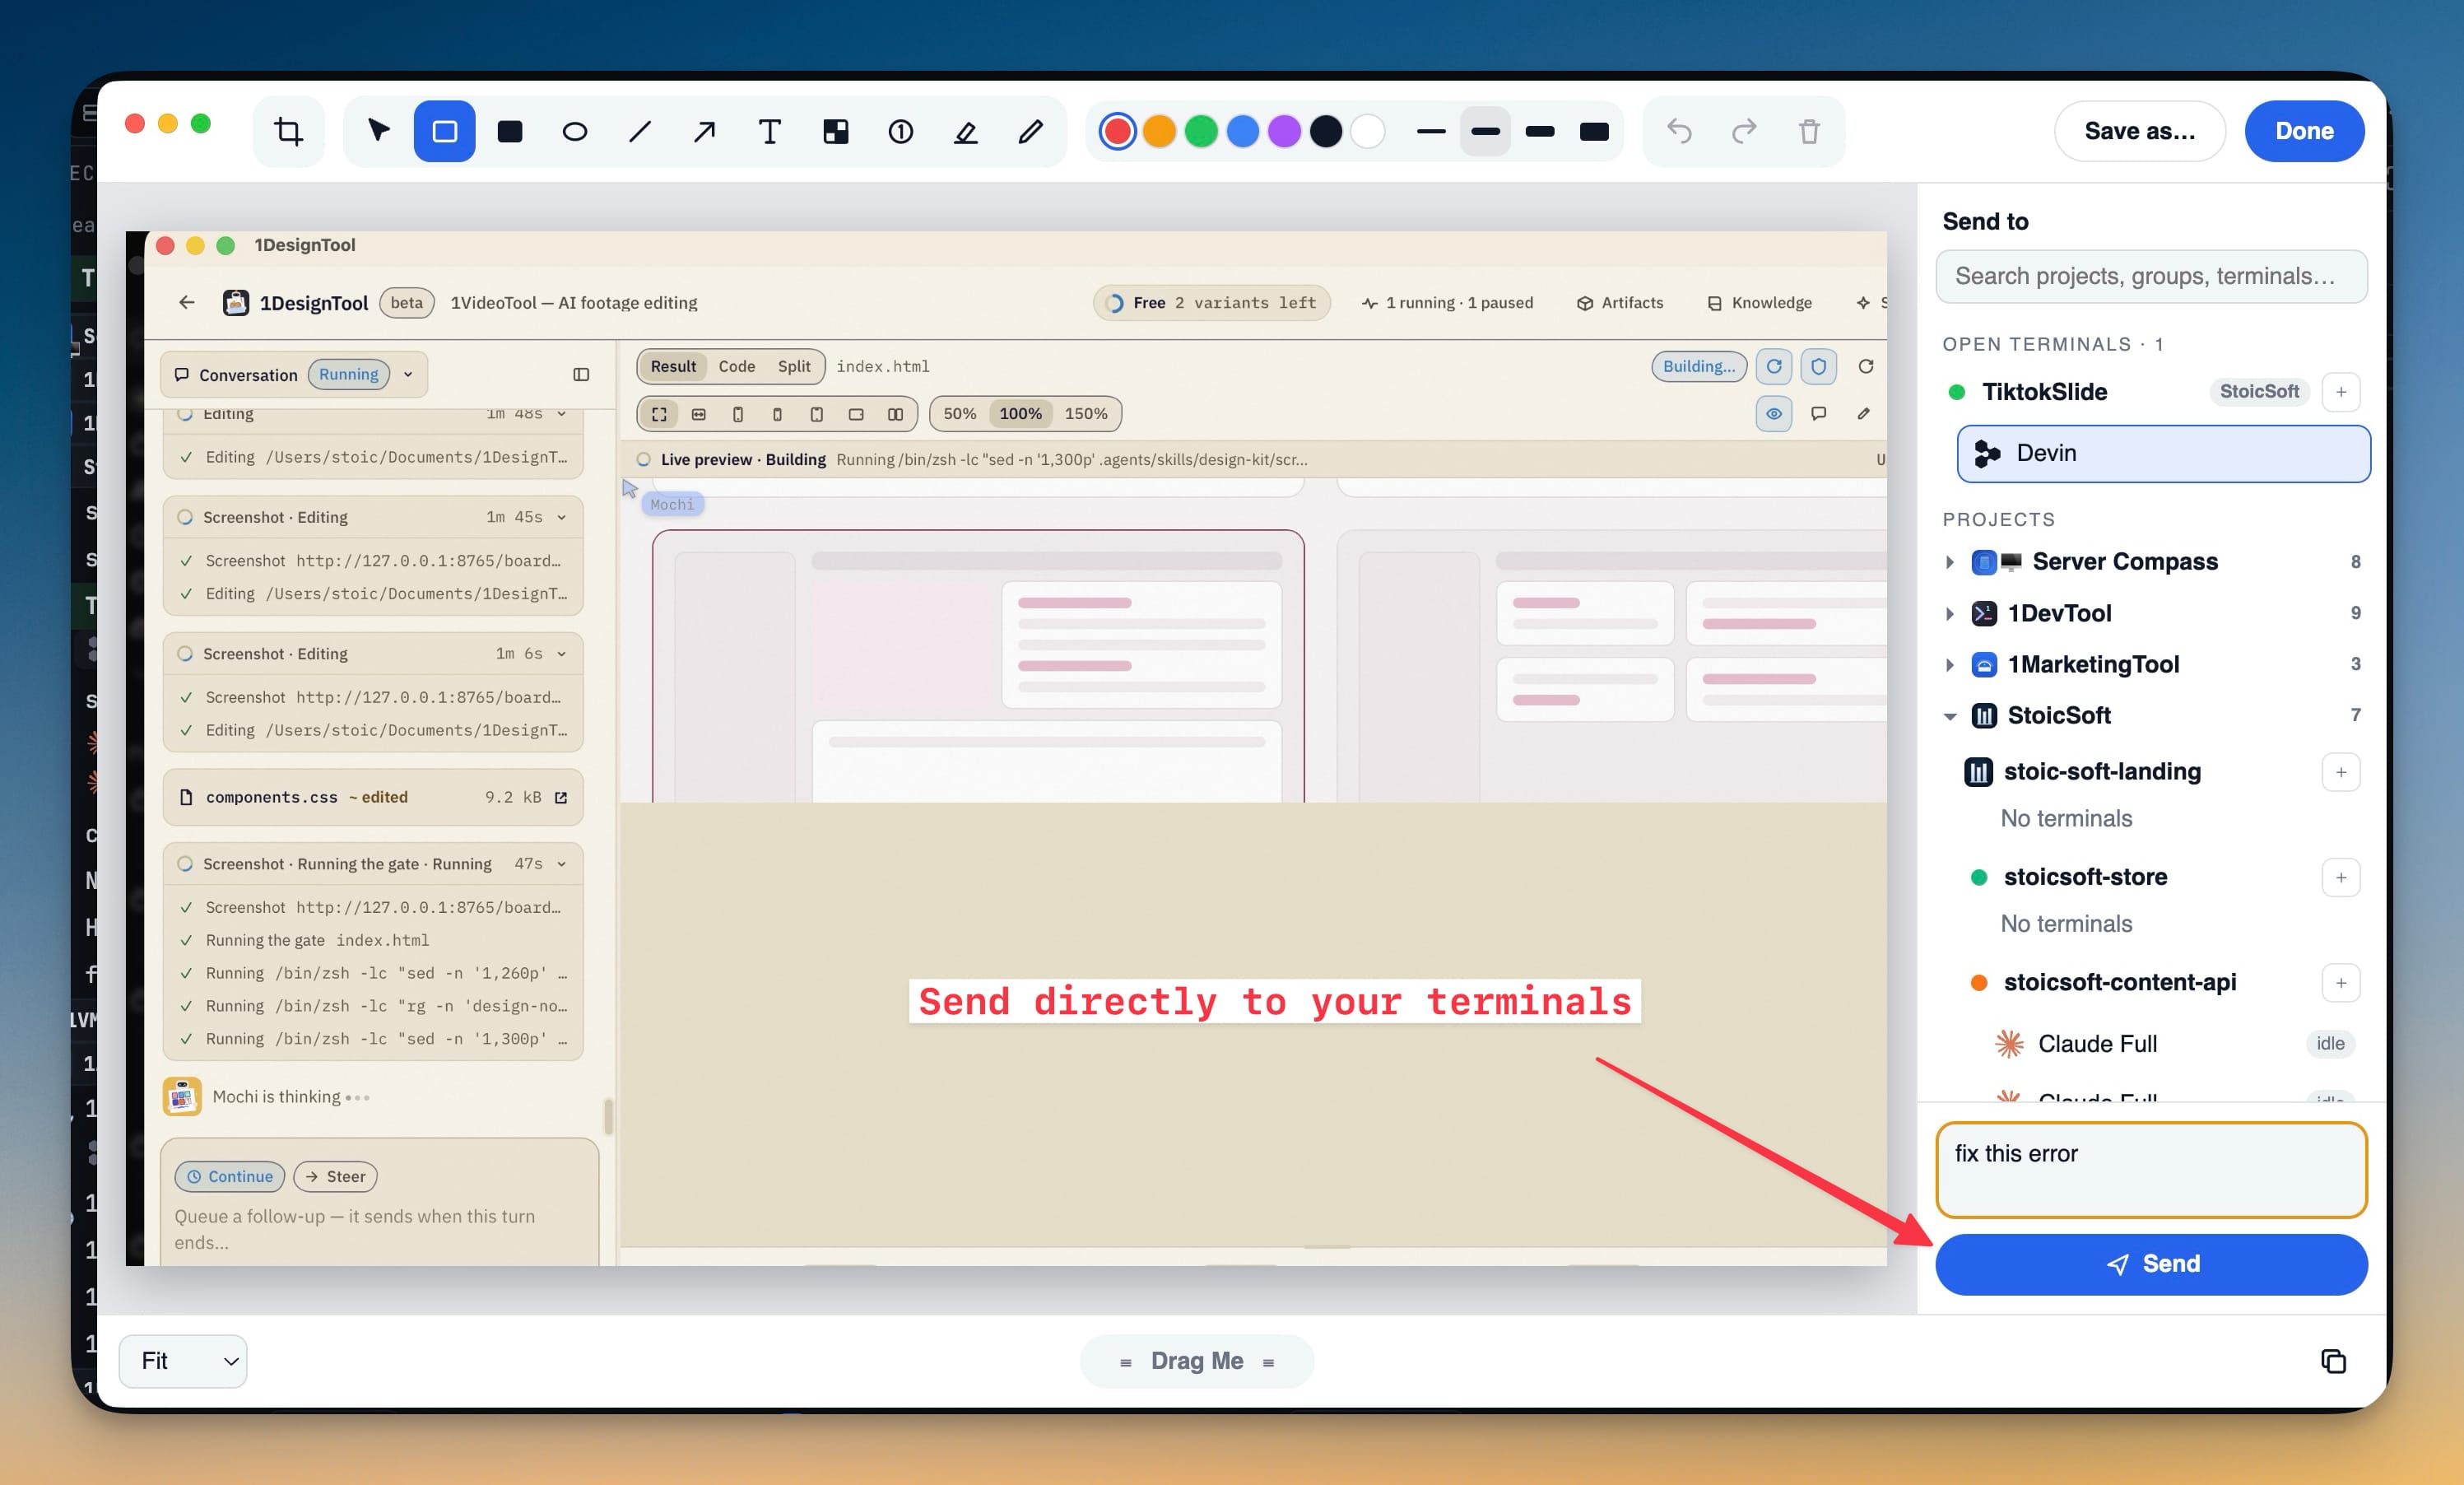
Capture any app on your computer with a global shortcut, mark it up, and send it straight into a running AI agent's prompt, or into a new terminal in any project. One screenshot can go to several agents at once.
More Screenshots
Click any image to zoom in
Why You Need This
How this feature boosts your daily productivity
Your agent can't see the screen you're looking at, and getting an image to it used to take five steps: the system screenshot keys, finding the timestamped file, a separate app to draw an arrow, saving again, then dragging it into the terminal. Screenshots collapses that into one shortcut and one click. Press Cmd/Ctrl+Shift+2 over any app on any display, drag a region or press Enter for the full screen, then crop, draw arrows and boxes, add text and numbered badges, or pixelate anything private in a floating editor. The Send to list pins your live terminals on top with agent logos and project avatars, lists every other project in your sidebar's order with search, and lets you tick several terminals so the same image reaches each. A closed terminal is started for you, and the + beside a project opens Add Terminal so the shot lands in whatever agent you create. It's opt-in: until you switch it on in Settings → Extensions, no shortcut is registered and no screen-recording permission is requested.
How It Works
Get started in 4 simple steps
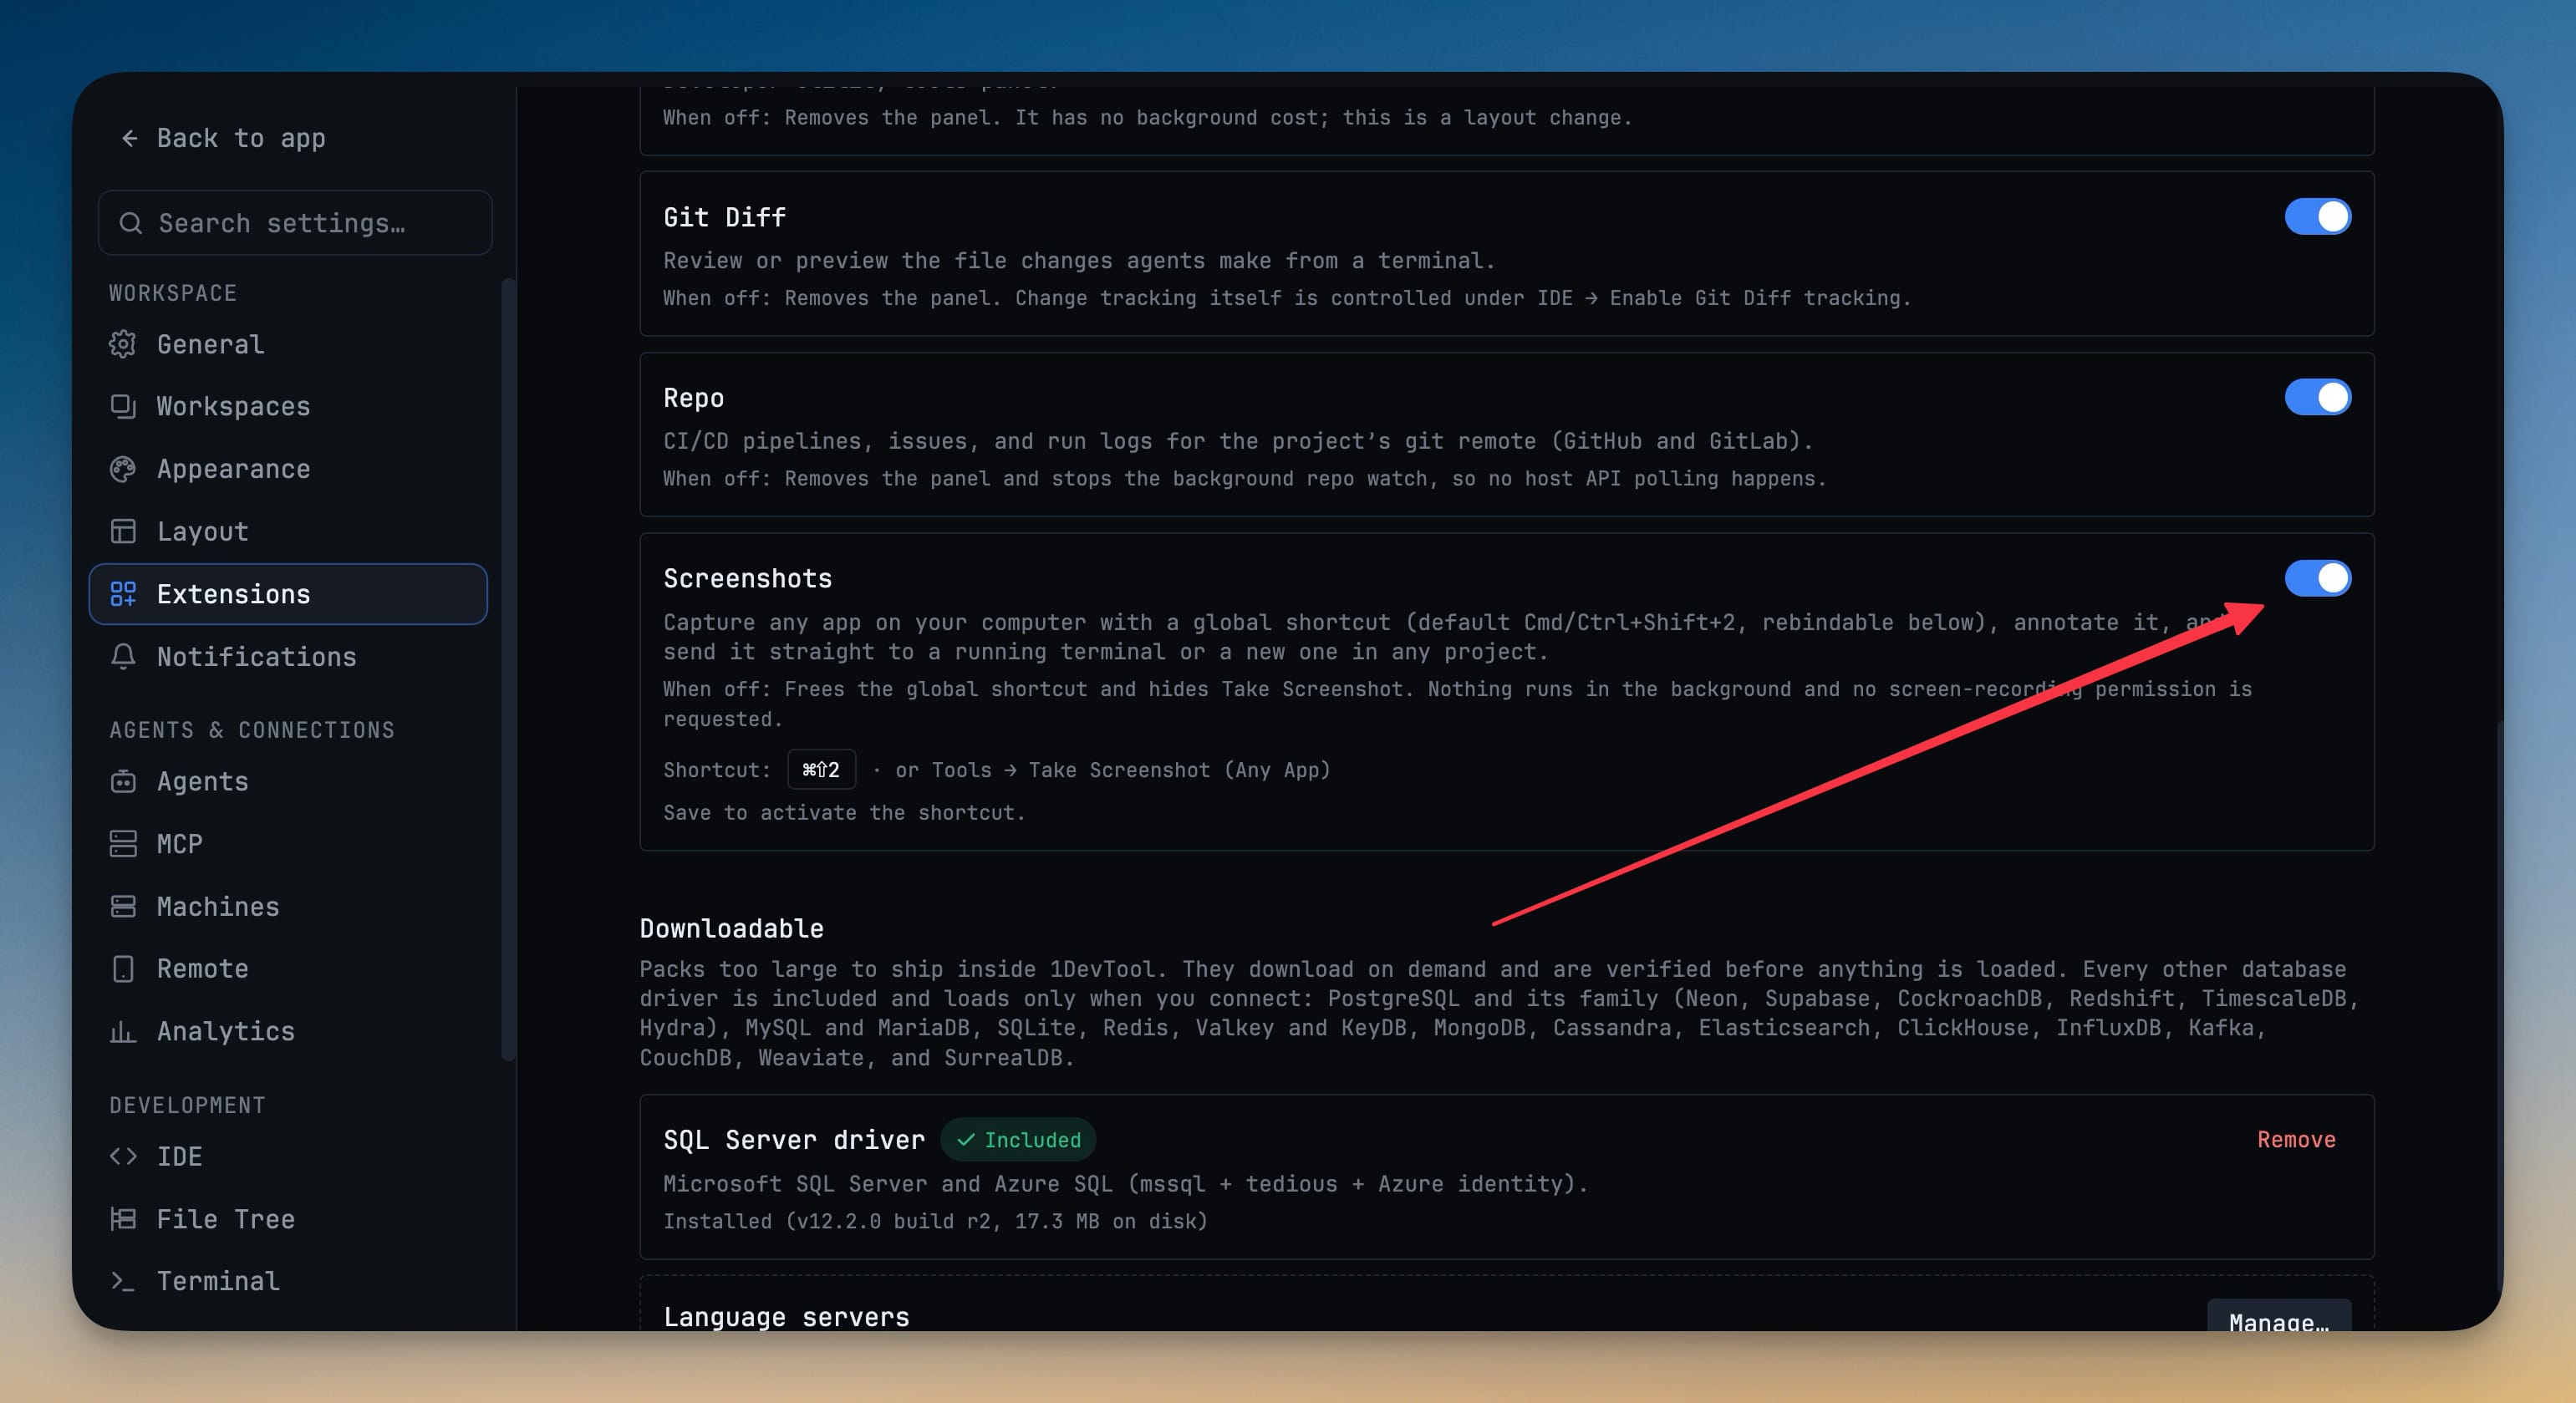
Switch it on in Extensions
Settings → Extensions → Screenshots. It is off by default; until you turn it on, no shortcut is registered and no screen-recording permission is requested.
Capture any app
Press Cmd/Ctrl+Shift+2 (rebindable) or Tools → Take Screenshot (Any App). Every display freezes; drag a region, press Enter for the full screen, or Esc to cancel.
Mark it up
Crop, draw boxes, ellipses, lines and arrows, add text and numbered badges, pixelate anything private, then undo, redo or zoom in for detail.
Send to your agents
Pick one or several terminals in Send to, add an optional message and press Send. The + beside a project opens Add Terminal and the shot goes into whatever you create.
Without 1DevTool
The manual way vs. the 1DevTool way
The Hard Way
The 1DevTool Way
Key Capabilities
Everything included with Screenshots
Why It Matters
The productivity impact of having ai productivity built into your workspace
Show the Agent, Don't Describe It
An arrow on the broken element tells the agent where to look in a way a paragraph never does, so the first fix is aimed at the right thing.
No Desktop Full of Screenshots
The capture goes from the screen to the prompt without a file you have to find, rename, drag and eventually delete.
One Image, Several Opinions
Tick two or three terminals and each agent gets the same evidence, so you can compare what Claude and Codex make of it.
Nothing Runs Until You Ask
Off by default: no global shortcut, no background process and no screen-recording prompt until you switch it on in Extensions.
More in AI Productivity
Other features in this category you might find useful
Prompt History
Search prompts and sticky notes from Remote Control while away from the desktop. Switch between This project and All projects, filter prompts by agent or notes by source, copy entries, delete with Operator access, and sync local prompt history.
Resume UI
Browse, search, and resume past AI sessions from Claude Code, Codex, and Gemini CLI — or combine multiple sessions into one.
Combine Sessions
Select sessions from Claude Code, Codex, and Gemini CLI and merge them into a single conversation — giving your next agent the full cross-agent context.
AI Diff Review Panel
Track every file modification any AI agent makes — Claude Code, Codex, Gemini, Amp, custom — and review, accept, or revert their work per file from a dedicated panel with inline diff overlays in the editor.
Ready to boost your workflow?
Download 1DevTool for free and experience Screenshots along with 319 other features — all in one app.