Send an HTTP Request
Test any API endpoint in seconds — type a URL, add headers, click Send.
Sending your first request takes about ten seconds. This guide walks you through the basics and covers everything you'll need for day-to-day API testing.
Your First Request
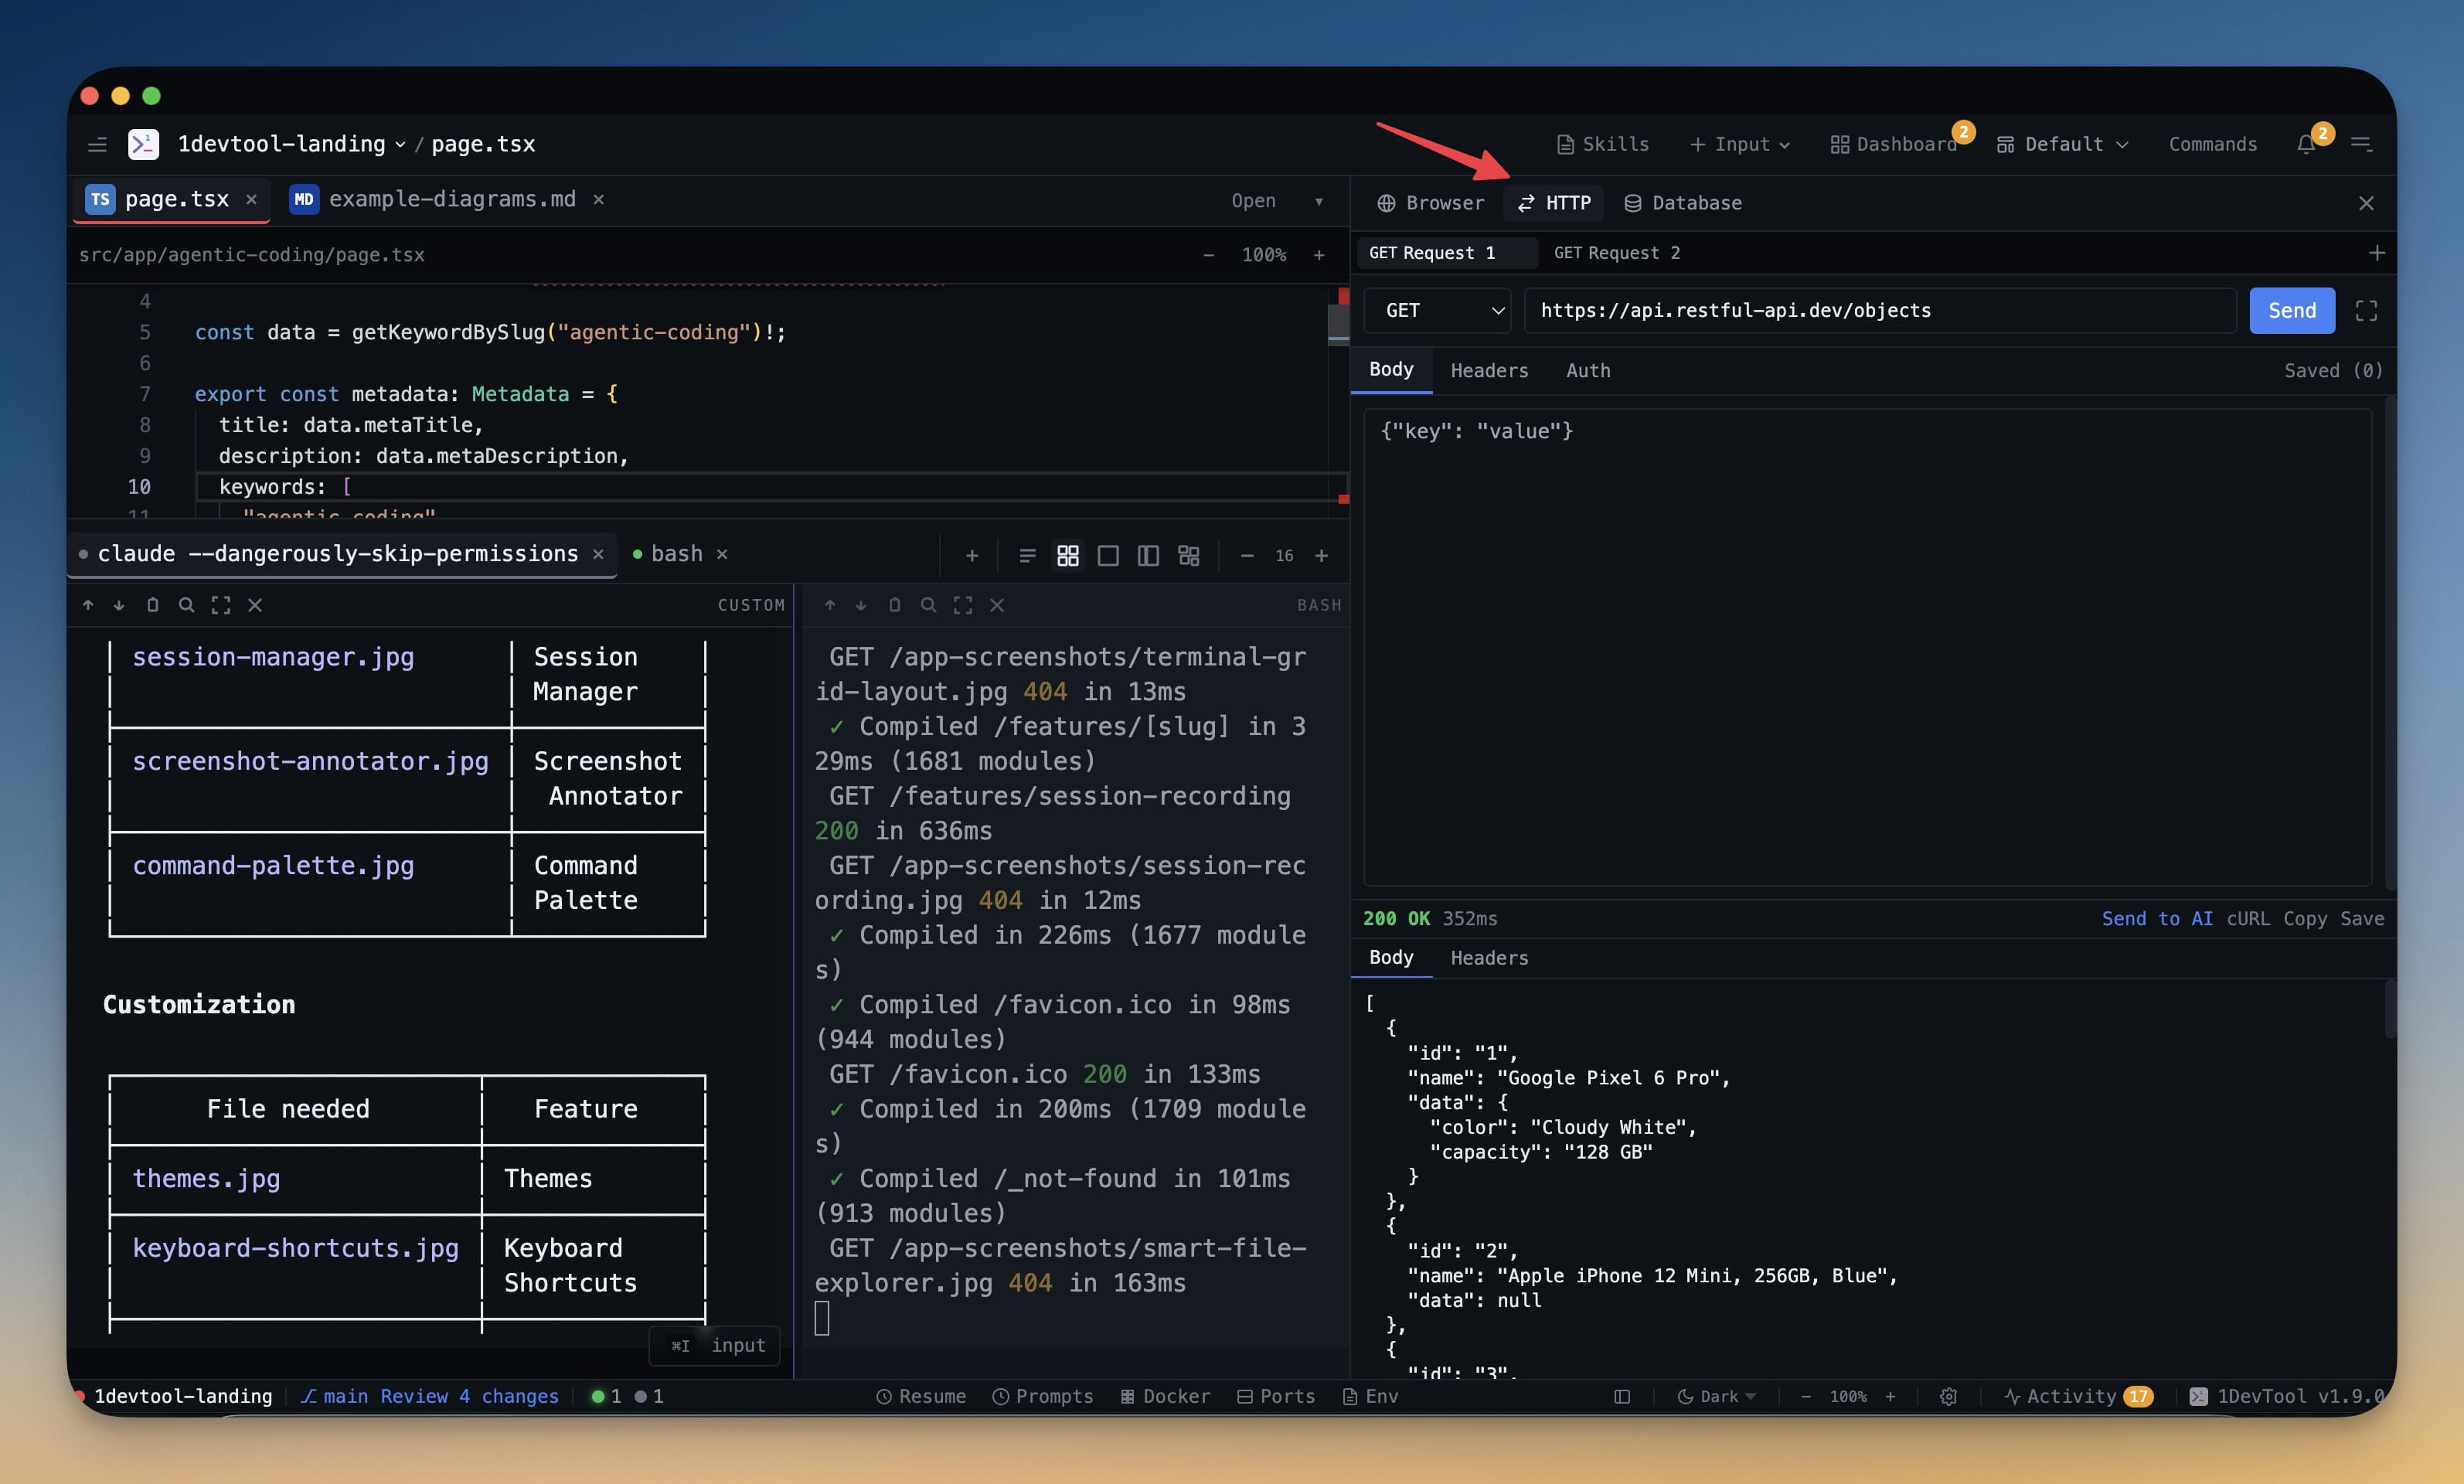
- Open the HTTP panel — press Cmd+H (Mac) or Ctrl+H (Windows/Linux), or click the HTTP icon in the left strip.
- Type or paste a URL into the address bar at the top. For example:
https://jsonplaceholder.typicode.com/posts/1 - Choose a method — the method dropdown defaults to GET. Click it to switch to POST, PUT, DELETE, PATCH, HEAD, or OPTIONS.
- Click Send — the blue Send button fires the request.
- Read the response — the response panel appears below with the status code, headers, and body.
That's it. No project setup, no configuration files, no accounts required.
Add Request Headers
Most APIs require headers — for authentication, content type, or versioning. To add them:
- Click the Headers tab (next to Params and Body)
- Click + Add Header
- Type the header name in the left field and the value in the right field
- Headers are sent automatically with every request until you remove them
Here are the most common headers you'll use:
| Header | Example Value | When to Use |
|---|---|---|
Content-Type | application/json | When sending a JSON body |
Authorization | Bearer your-token-here | For token-based auth (JWT, OAuth) |
Accept | application/json | Tell the server what format you want back |
X-API-Key | your-api-key-here | For API key authentication |
You can add as many headers as you need. Uncheck the checkbox next to a header to temporarily disable it without deleting it.
Add a Request Body
For POST, PUT, and PATCH requests, you'll usually send a body with data. Here's how:
- Click the Body tab
- Choose JSON from the format dropdown (or Form, Text, or Binary depending on your API)
- Type or paste your JSON payload
Example JSON body for creating a new post:
{
  "title": "My New Post",
  "body": "This is the content of the post.",
  "userId": 1
}
The editor validates your JSON as you type and underlines any syntax errors. Fix them before sending — a malformed body will usually cause a 400 Bad Request.
Inspect the Response
Once the request completes, the response panel shows everything you need:
- Status code — displayed prominently at the top. Green for 2xx success, yellow for 3xx redirects, red for 4xx client errors and 5xx server errors.
- Response time — how long the request took, in milliseconds. Useful for spotting slow endpoints.
- Response size — the size of the response body.
- Body — automatically pretty-printed if the response is JSON. Use the tree view to collapse and expand nested objects.
- Headers — click the Headers tab in the response panel to see every header the server sent back.
A 200 OK with valid JSON means your endpoint is working. A 401 Unauthorized usually means your auth header is wrong. A 404 Not Found means the URL path is incorrect.

Save a Request
Once you've got a request working, save it so you don't have to type the URL and headers again:
- Click the Save button (the floppy disk icon, or press Cmd+S)
- Give the request a descriptive name — something like "Get user by ID" or "Create product"
- Choose or create a collection to save it to
- Click Save
The saved request appears in the left sidebar under its collection. Click it anytime to reload the URL, method, headers, and body exactly as you saved them. Collections persist across sessions, so your requests are always there when you come back.